
Modding Basics: Tools and Tips to Start Modding Your Own PC
Hey everyone, it’s LiquidHaus again! In this article, we will walk you through the basics of PC modding, including all of the tools and tips that you’ll need to start this DIY project!
This more individualized branch of the PC hobby is a great way for tons of people to express themselves, while also being able to get the most functionality and customization out of a tool that you essentially use in every part of your everyday life. PC modding has also become increasingly popular as more people are working from home and needing PCs that can handle a more demanding workload, bringing in a completely different audience to the PC world. HYTE actually has a write-up explaining all of the reasons why your should upgrade your work system to an ITX PC here!
Why PC Modding?
You might have a lot of questions when you start a project like this. How do you mod a computer? What tools will I need? What is modding, anyway? The very idea of modding is simple: modifying something to make it your own. And it’s actually really simple.
An easy example of modding is cutting away a part of your case and mounting a new case fan for more ventilation. We had briefly discussed in Part 1 of our Y60 build overview that we believe that the best mods still come from necessity, but modding can go as far as partially disassembling your PC case to paint a single side of it to create a new color palette for your PC.
Down to the Basics
The tools of this trade aren’t too far out there and you will likely be familiar with a lot of them.
Cutting
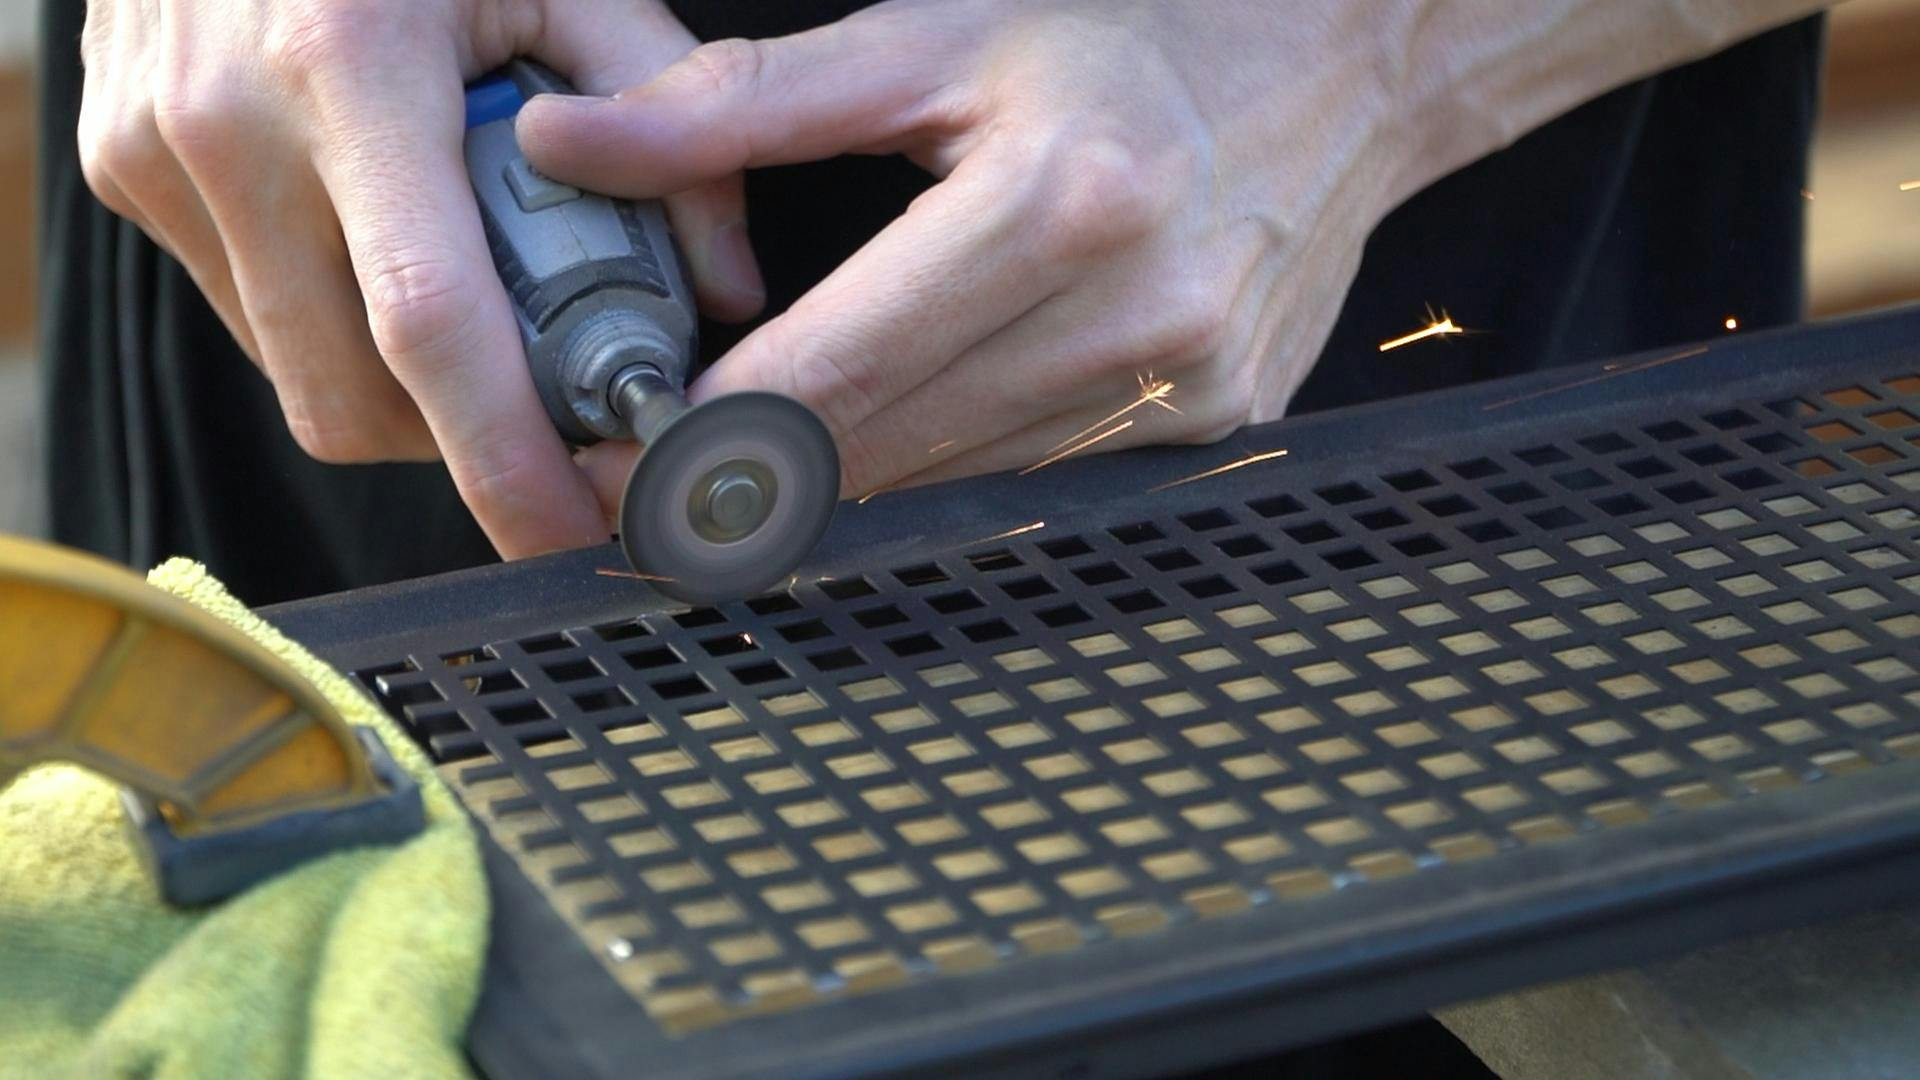
The most essential tool that we use is the dremel.
Obviously, Dremel is an exact brand, but that name has carried itself to pretty much dub any handheld rotary cutting tool to be called a dremel. Some of our favorite mods over the years have been the result of a simple dremel job that only took a few minutes.
Now it may be easy to go and just grab a dremel to start hacking apart your PC case, but you want to be taking every safety precaution to reduce any chances of accidents. This includes well-rated tools, eye protection, and even sometimes gloves.
While using power tools, like the dremel, you will want to make sure that the parts you are working with are secure. We like to use trigger clamps or vice grips to maintain total control over both the part we are modding, as well as the tool that is being used. You can also use this trick opposite by clamping the tool down and using your hands to maneuver the part.
Measuring
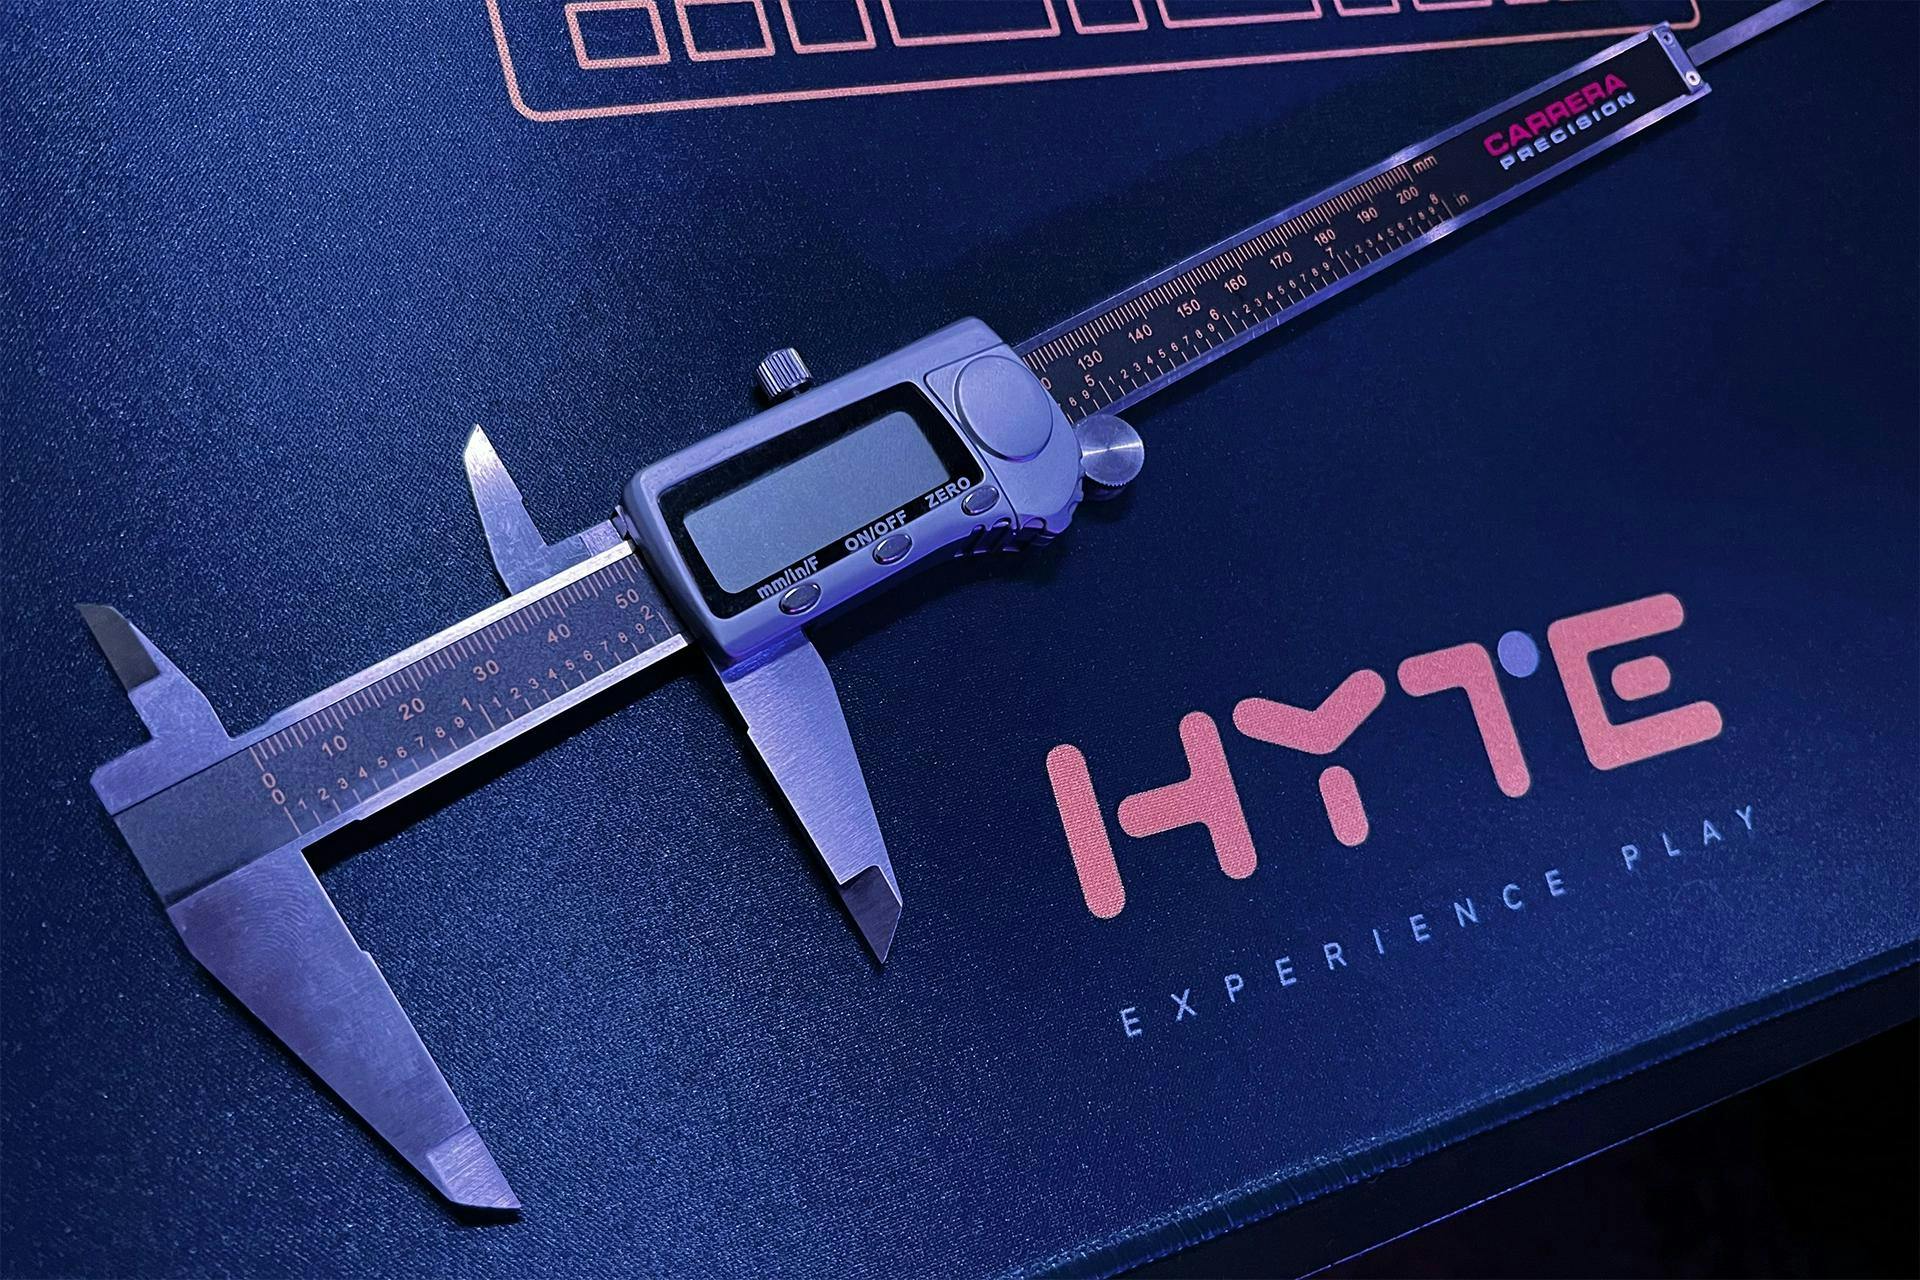
While we jumped into the cutting aspect first, the most important step of modding is measuring something before making that first cut. We’re talking like 3 to 4 times, maybe even 5. In fact, there is no limit to how many times you can measure something before making that first move. To assist with this, there are a few trusty tools that we recommend having in your toolkit.
Starting out with a simple tape measure, we can get an initial sense of what sizing we’ll be dealing with. It is likely that you are going to need more precise measurement, so that’s when we would recommend having an affordable pair of digital calipers on hand.
Now that you have taken your measurements (several times!), it’s time to mark exactly where you will need to cut. We recommend using blue painter's tape to protect the case material and it also allows you to mark freely without having to draw directly on the case. In addition to the tape, we like using a classic, erasable pencil for any measuring process.
Mounting
During the modding process, you might find the need to mount something to a panel or bracket and there aren’t any existing mounting holes for the components that you have. This can easily be fixed with a drill and some nice drill bits!
We personally use a Makita drill that offers various torque settings to handle anything from drilling into stone to tightening precision screws. As for the bits themselves, we have had a good experience with Milwaukee. They are durable enough to provide reliability as well as longevity.
This process is very similar to the dremel cutting. The blue painter’s tape and pencil will come in handy again for making a template for drill locations stress-free. Also, don’t forget those measurements!
More Tools
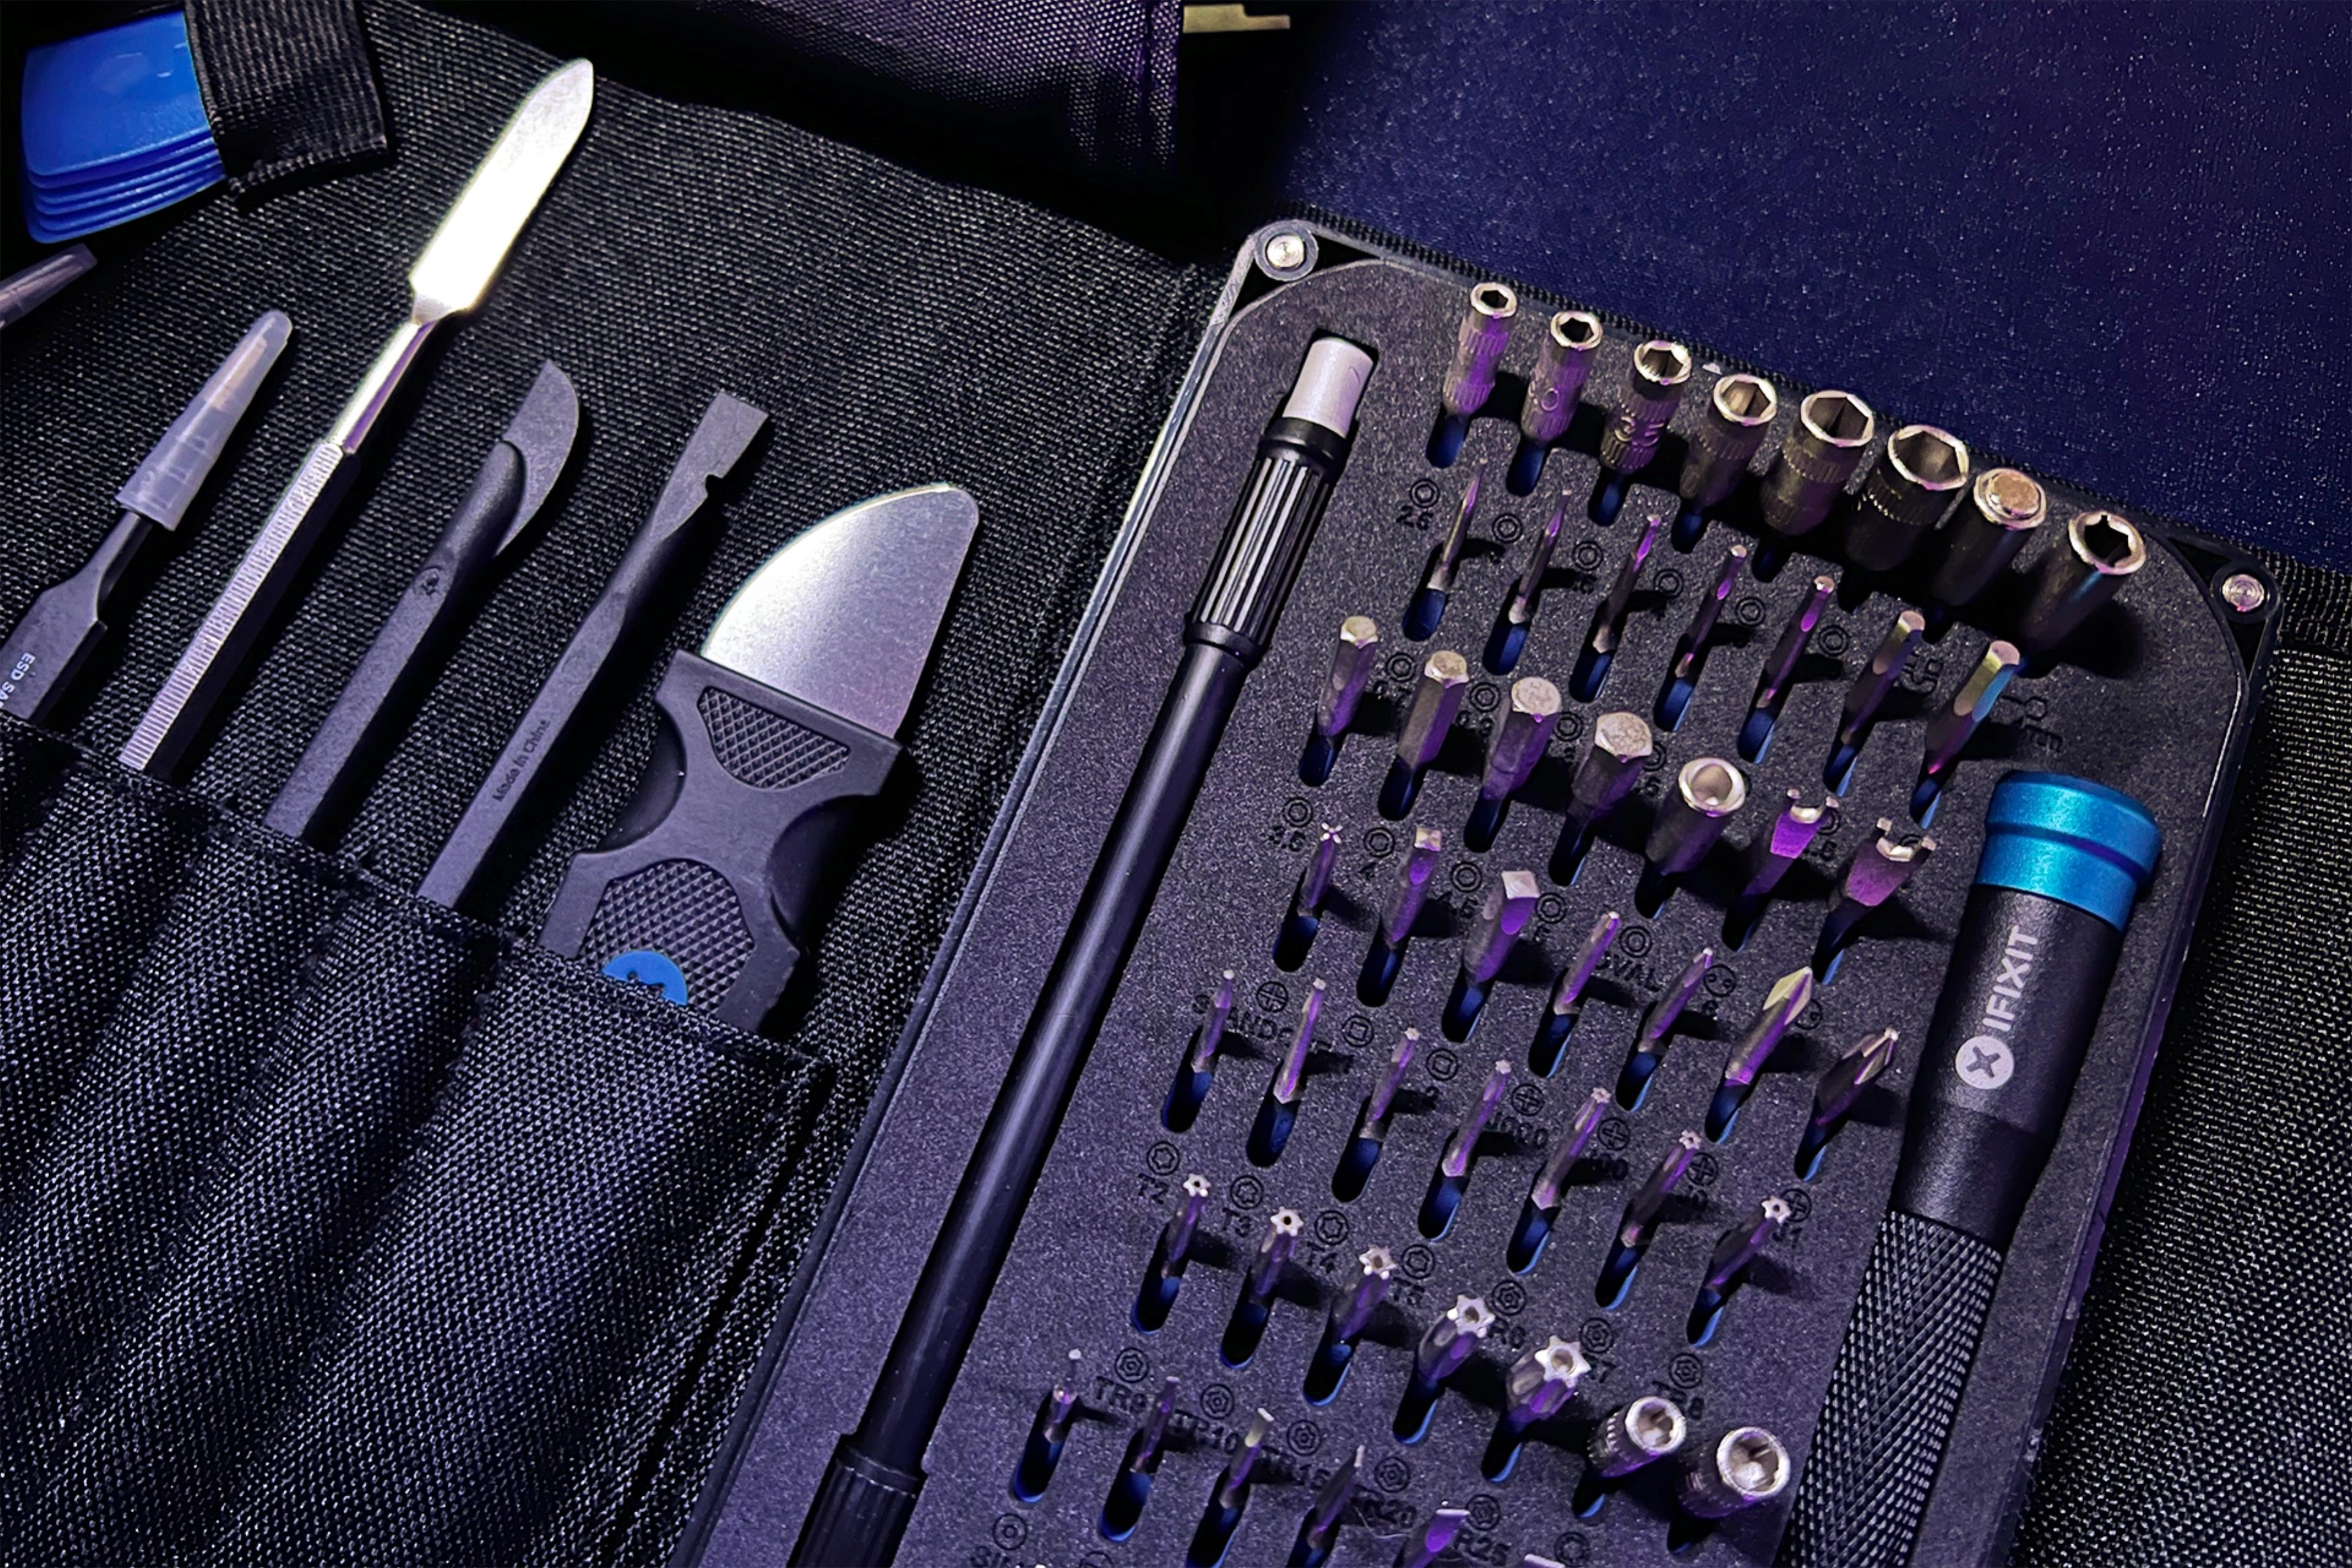
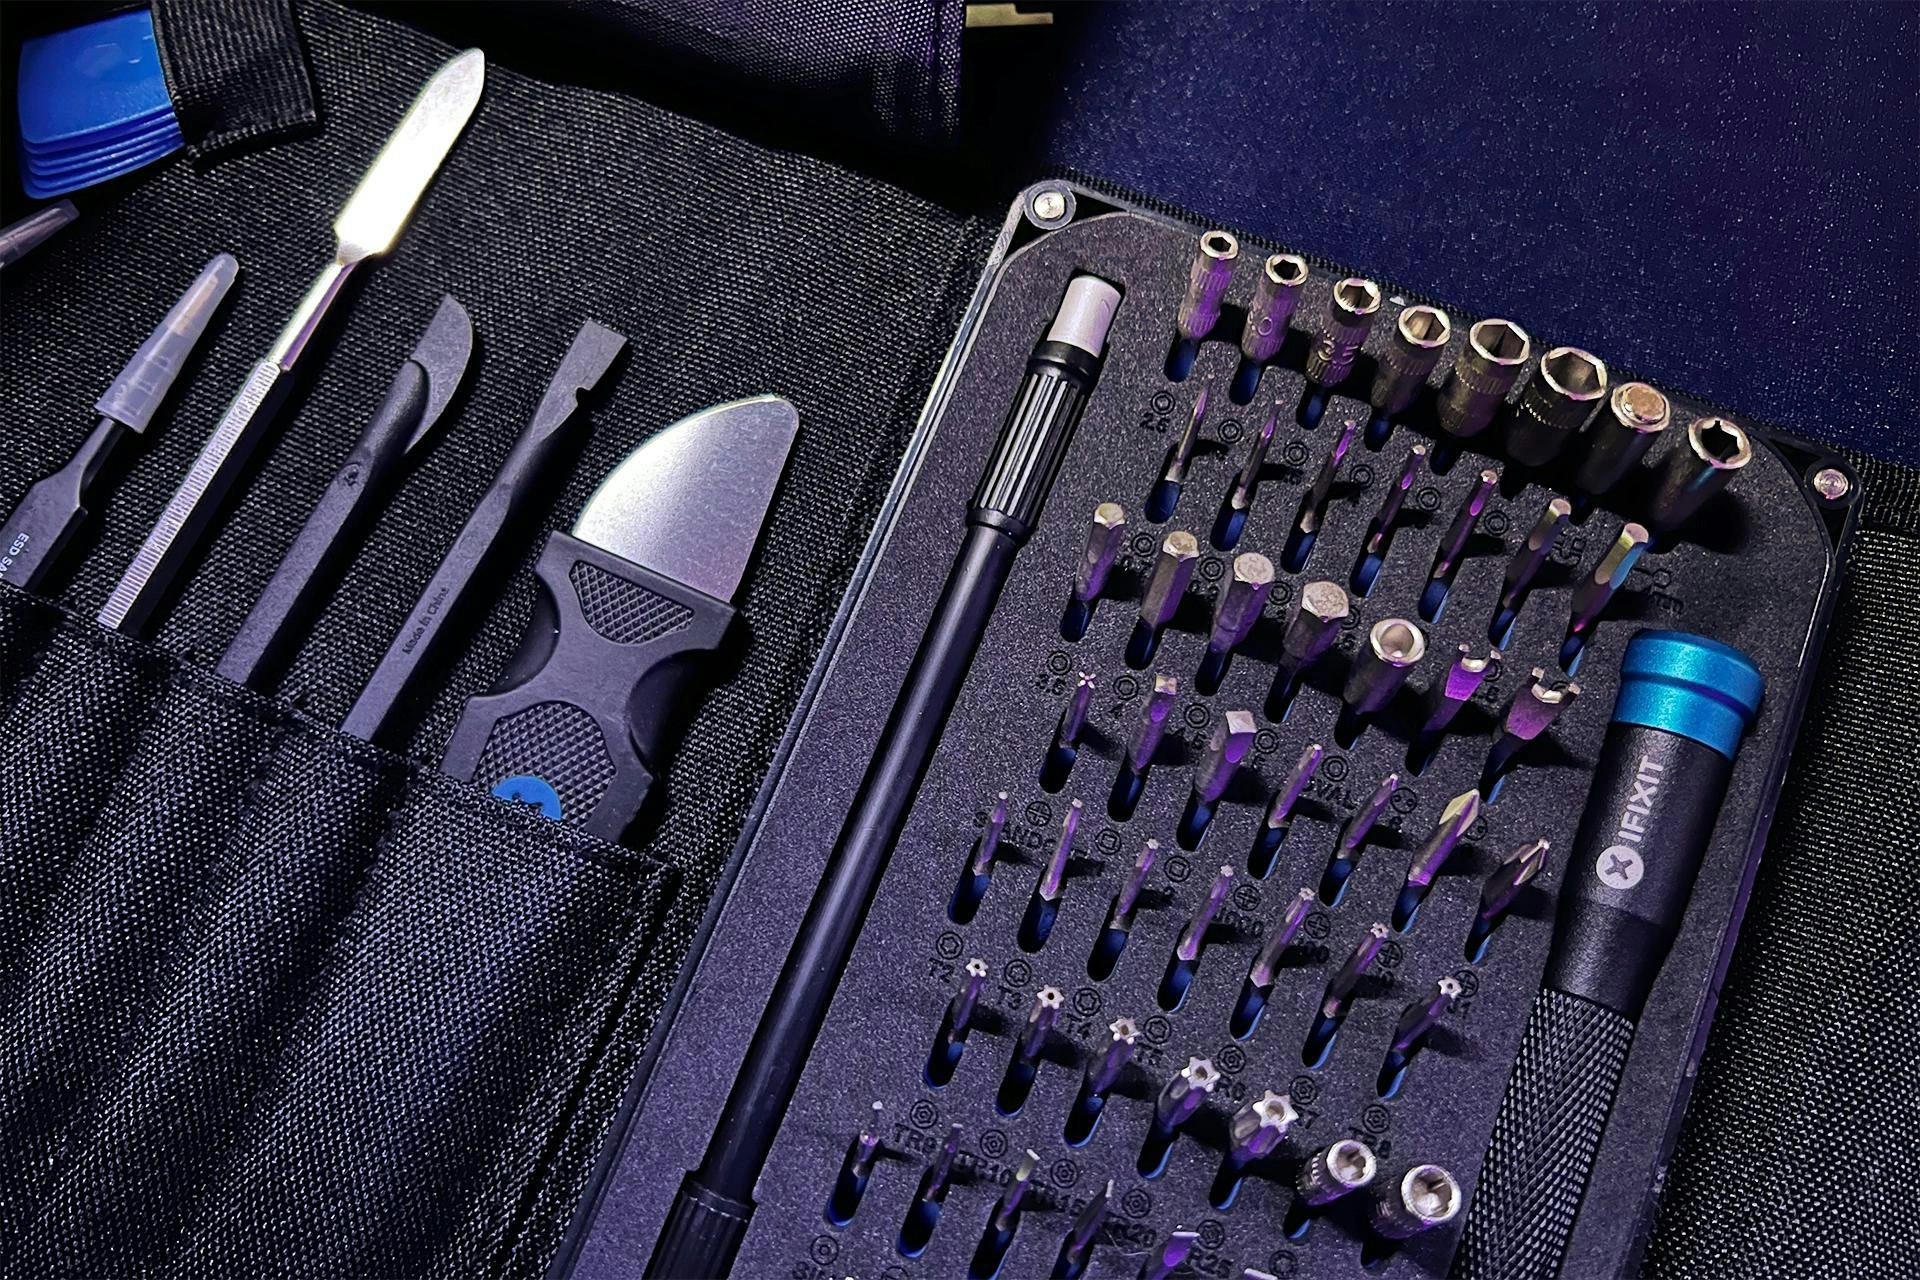
When it comes to sorting out what sort of hand tools you need for the more precision-based mods, we’ve had great success with iFixIt kits. They provide every basic bit in every size that you will need. Their kits are perfect for disassembling a case and getting started with modding. These kits are essential to have for any PC modder or builder.
Now that we’ve talked about all of the physical tools that you will need, it is important to mention that you will need both time and patience to get a project like this done. PC modding requires precision and you will need to have both to execute the project without any avoidable drama.
Wrapping Up
In the end, you are going to be thrilled to have something that is complete to your liking, and there is a great sense of pride that comes along with knowing that you created something so cool, all on your own. You also might find a great liking to the PC modding world as we have!
Keep your eye out for our next topic where we cover modding your PC for better airflow.
Featured Posts

Metaphor: ReFantazio Tips & Tricks
Boost your experience in Metaphor: ReFantazio with helpful tips and tricks. From gameplay basics to progression advice, we’ve got you covered.

HYTE at COMPUTEX 2025
HYTE was at COMPUTEX 2025 in Taipei, Taiwan to showcase the latest innovations in PC building and gaming technology.

Best Archetypes - Metaphor: ReFantazio Guide
Uncover the best Metaphor: ReFantazio archetypes and how they shape your journey. Explore unique builds, roles, and strategies across all archetypes.

HYTE Tariff Announcement
On 4/8/25 HYTE will regrettably be forced to increase prices due to the ongoing tariffs. Our full statement & additional details are enclosed.