
Project Y60: Part 2 - The Plan
This is the second blog in the Project Y60 series from LiquidHaus!
Part 1 - The Concept
Part 3 - Assembly
Part 4 - Final Touches
PC modding is growing, and with that growth comes new possibilities on how to approach it.
For our Y60 project, some specialized acrylic work was needed. We were fortunate enough to have HYTE send over the 3D models for the Y60; this allowed us to actually take a look at what needed to be done to achieve our vision.
Our 3D Modeling Tools
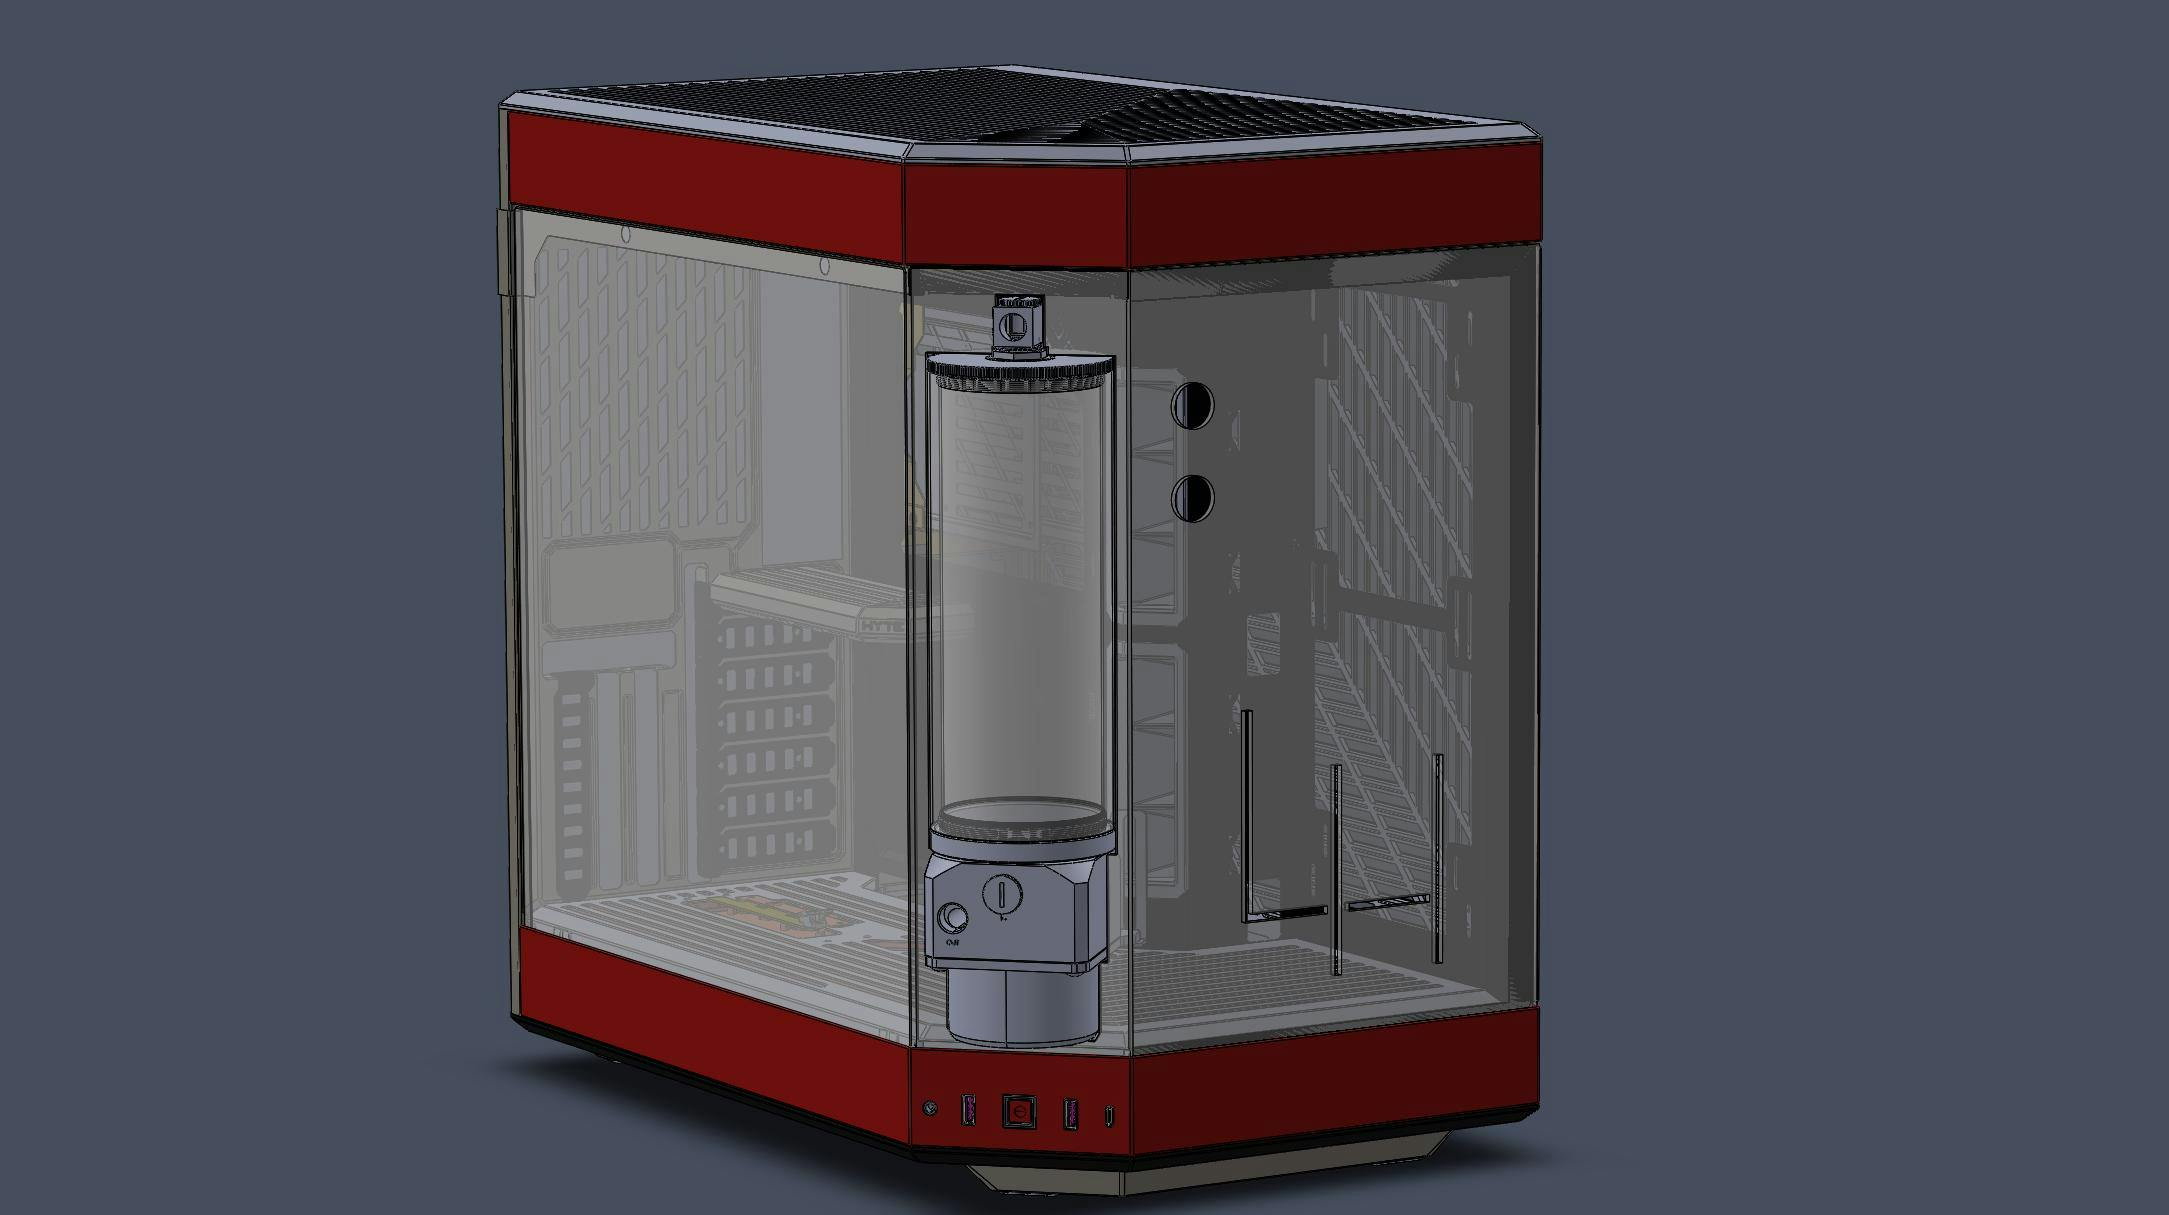
In addition to the Y60 model, we also were able to gain access to the 3D model from Koolance. Having and utilizing 3D models is incredibly helpful when it comes to planning out a mod.
Lucky for us as PC modders, they actually offer 3D models for every product that they produce, something that isn’t very common but very welcome to see in this industry. Running these models through Solidworks netted us a solid vision for how the actual mod would go.
Selecting Watercooling Parts
Trying to puzzle out what parts are best in our projects is where the fun comes in. The Y60 build was no exception!
It was tricky deciding which parts to use for this build, since you have to envision what you want the build to look like, regardless of the specific parts used. Below is what we decided to go with for the water cooling parts list:
Pump And Reservoir:
Koolance PMP-450/S Pump Top/Reservoir Base
Koolance 60mm to 80mm Thread Adapter
Koolance 80mm Reservoir 200mm Body
Koolance Low Profile 90 Degree Rotary Fitting
Radiators and Fans
Watercool Heatkiller Rad 360-S White Radiator
Watercool Heatkiller Rad 240-L White Radiator
Noiseblocker eLoop White 120mm Fans
Noiseblocker eLoop X ARGB 120mm Fans
Other Fittings
Bitspower Gold Inline Filter Fitting
Monsoon EV2 White Compression Fittings
Monsoon EV2 Black Compression Fittings
Barrow Gold 90 Degree Rotary Fittings
Barrow Gold 45 Degree Rotary Fittings
Barrow White Static 45 Degree Fittings
Barrow Black Static 90 Degree Fittings
GPU Block
Bitspower RTX 3090 Asus TUF Waterblock
CPU Block
Optimus Foundations V2 CPU Block
Coolant
EKWB Solid Scarlet Red Premixed Coolant
A large part of why we enjoy PC modding so much is because there are a lot of brands that offer a lot of great products. As you can see from our build list, we love to utilize a plethora of different brands in a single build.
There is so much talent in this industry, and it’s easy to get swept up by big brands that already provide an offering for a specific part (or list of parts) that you may be looking for when putting together a build. However, mixing up brands can sometimes create really unique synergy and a e s t h e t i c.
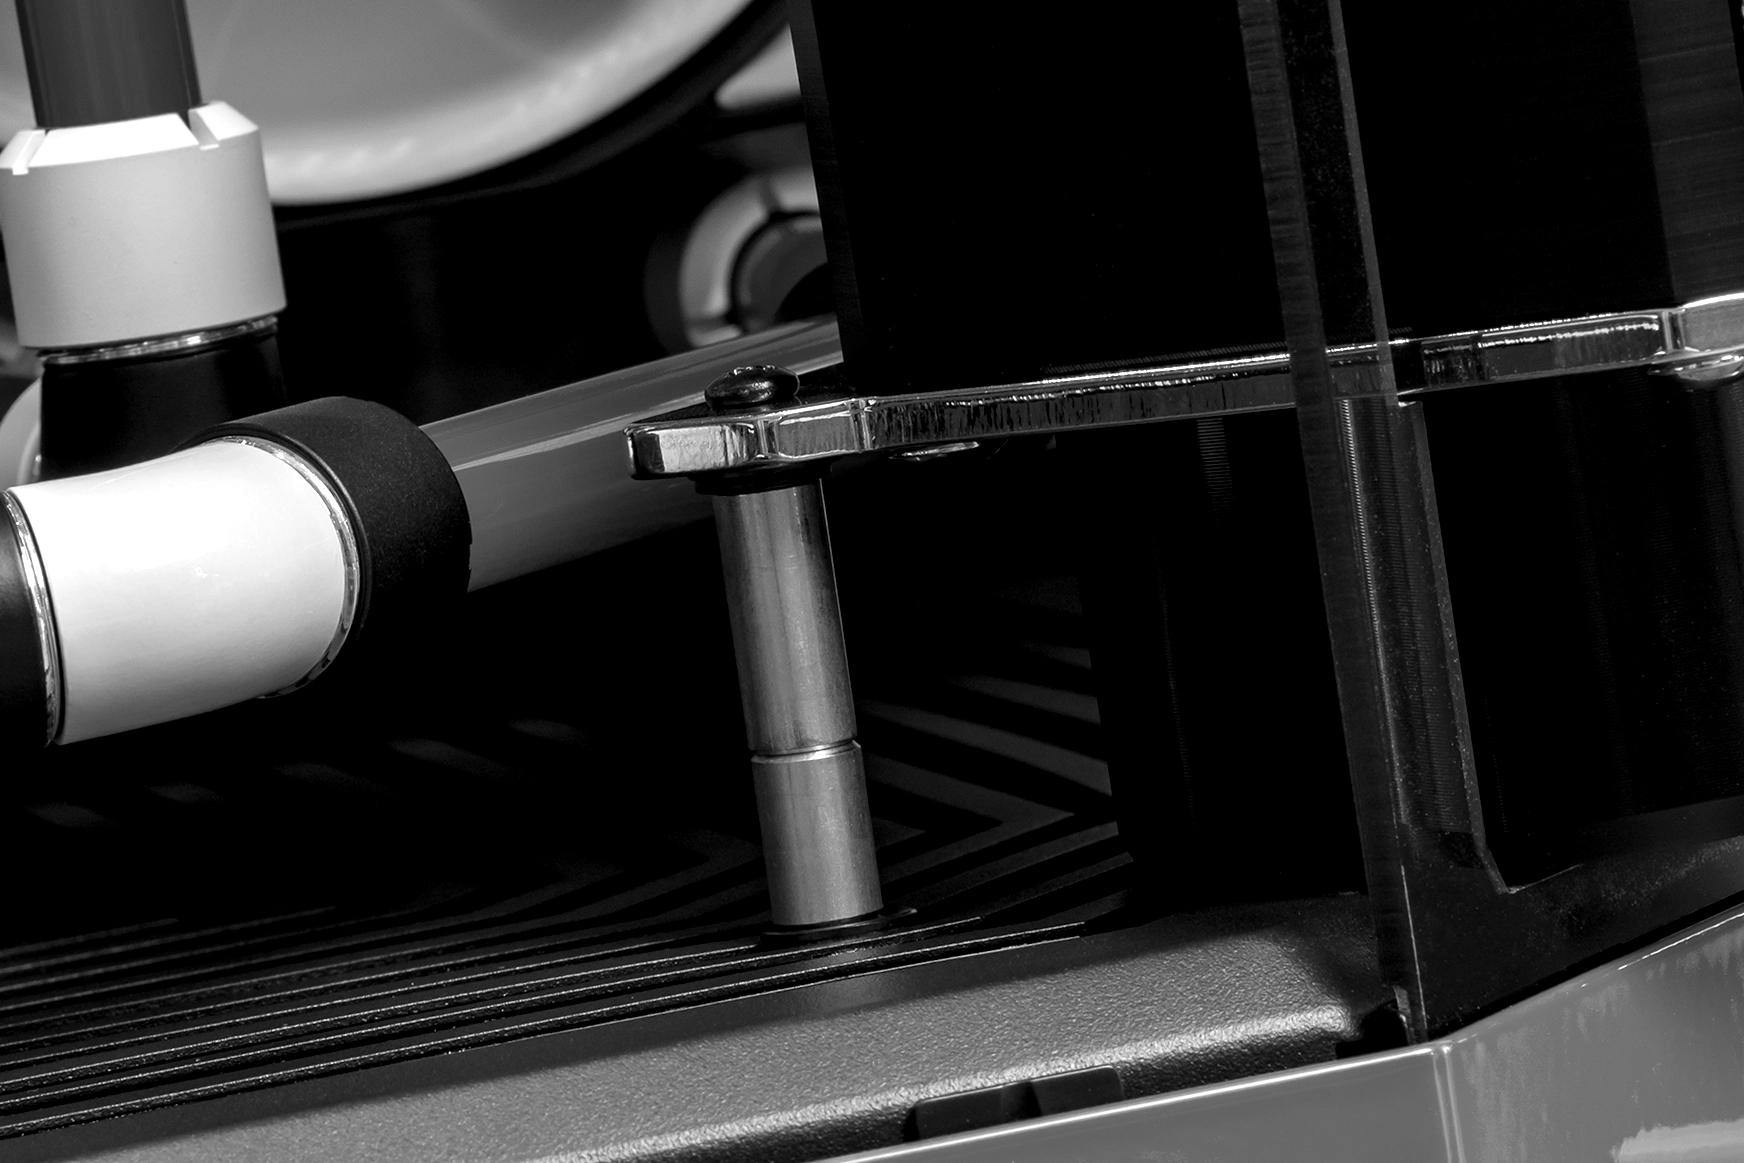
Mounting the Reservoir
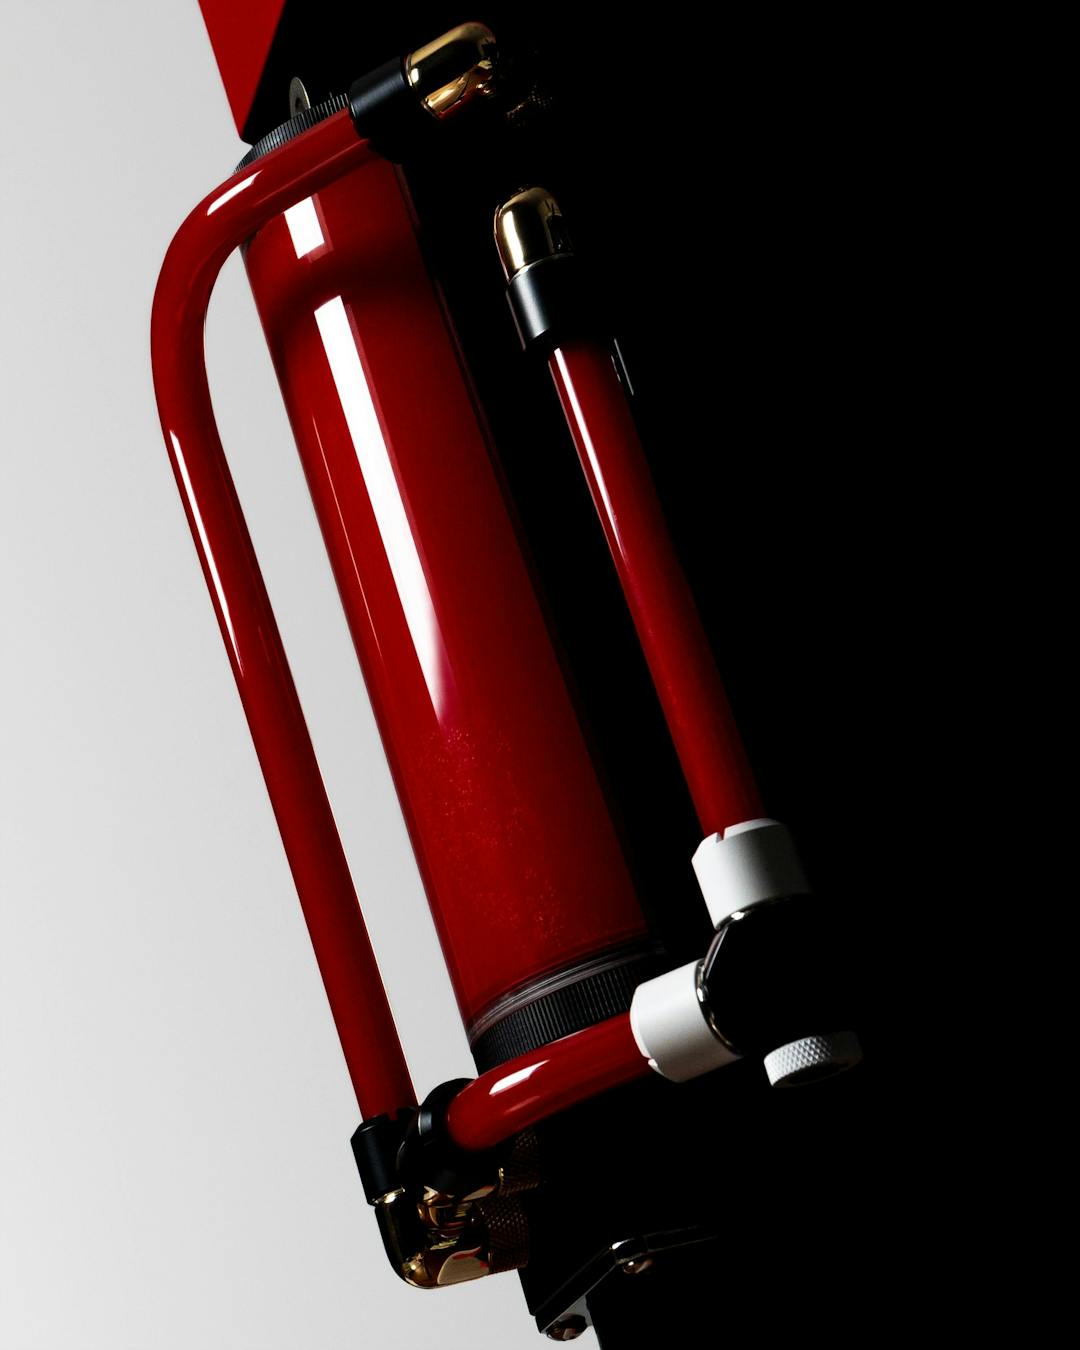
With the plan for the Koolance reservoir to sit halfway through the front panel, the challenge then became how to securely mount it. My thought process towards that was: first, making sure it would fit at the location that I wanted, and second, sorting out exactly how to mount it.
Ideally, you have a build plan when you are putting together a PC. This will assure that you have all of the parts that you need to successfully build, but it is not uncommon to come up with or alter your plans accordingly.
Mounting the reservoir was a great way to utilize the integrated ventilated false floor that the Y60 features. The plastic for the false floor is just over ⅛” thick and very rigid. It gave me confidence that I could mount something to it with some weight and not worry about durability.
I drilled out the original M3 threads on the Koolance mount so that I could run some 6-32 threaded screws through it, going down through the false floor for proper securement.
For increasing the surface area of the bottom side of the 6-32 screw mounting, I used 1” washers to help spread the overall force of the screws being tightened for proper securement of the reservoir.
To clean up the look of the mod, I utilized aluminum spacers to cover the bare screw threads, as well as topside washers to make sure the spacers sat flat onto the false floor.
The overall height of the combined spacers and washers being the same as the pump height helped make sure that when the final tightening of the screws happened, the reservoir sat completely flat when mated to the false floor.
The end result looked like this:
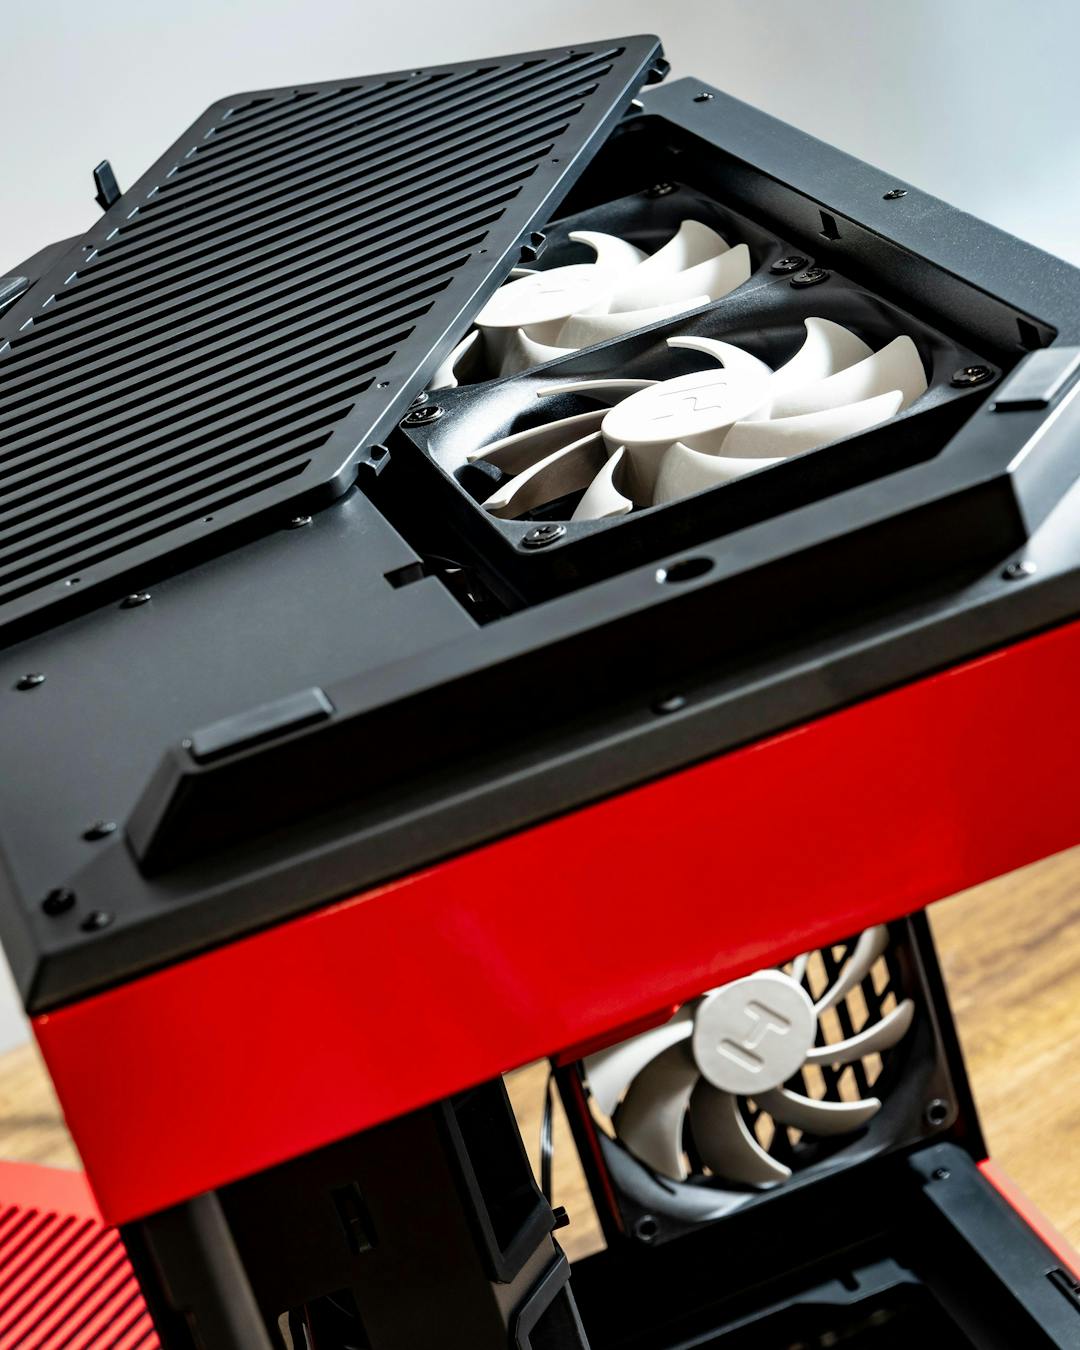
The Y60’s false floor also houses the two 140mm Noctua NF-A14 Fans that are dedicated to moving air into the case.
Hardware Installation: Radiators
After the reservoir mounting was finished, it was time to move on to the rest of the build. I wanted to make sure that any case modifications needing to be done would come before installing any hardware.
It’s always safer to finish your case mods first, before installing any hardware - you don’t want random metal or plastic shrapnel flying into an open slot on your motherboard or another component and messing up your hardware.
The next tricky aspect of the build was making sure I could cleanly sort out routing tubing from the bulkhead from the front acrylic panel, into the top 360mm radiator.
The fitment got somewhat tight in this area, but only because of our choice of bulkhead location. I had initially thought to reverse the 360mm radiator, and have the end tanks on the I/O side of the case, however it was clear that HYTE designed the radiator to be used with the end tanks towards the front corner of the Y60.
Obviously, the aspect of case modding can be perfectly applied to this situation, since you shouldn’t limit yourself on how a case manufacturer initially designed components to be laid out. I am confident that there is a potential for a mod here to relocate the radiators if need be.
Part 3: Assembly
Now that we’ve got our mods in place, it’s time to finally assemble this system! Check out the next part of our case mod series to see how the build turned out!
Featured Posts

X50 Astral Orange Is Almost Here: Pick an Orange
The X50 Astral Orange is almost here, and we are turning up the heat in the best way we know how. It is time to celebrate the orange side of gaming.

Black Friday Gaming Gear & PC Deals 2025
HYTE Black Friday sales are here, and we’re excited to share the amazing deals we’ll be offering this year! Our Black Friday sales event is your chance to save big on some of our most popular products. From November 20th through December 2nd, enjoy incredible discounts on PC cases and gaming accessories that bring both performance and style to your setup. If you’re looking to upgrade, now’s the perfect time to do it with HYTE.
Official HYTE x Honkai: Star Rail Firefly Collection!
The stars have aligned, and the Official HYTE x Honkai: Star Rail Firefly Collection is ready for launch.
HYTE's 4th Anniversary Sale!
We’ve come a long way, and it’s all thanks to you! To celebrate HYTE’s anniversary, we’re giving back with a limited-time Anniversary Sale from Oct. 5 to Oct. 7.