
Project Y60: Part 3 - Assembly
This is the third blog in the Project Y60 series from LiquidHaus!
Part 1 - The Concept
Part 2 - The Plan
Part 4 - Final Touches
With how well the Y60 mod turned out, it was really exciting for us to move forward with the assembly of the system.
Our goal was to find the cleanest way to integrate the red of the Y60 into the rest of the components so that you could have an overall arching color scheme throughout the entirety of the build.
Hardware Aesthetic
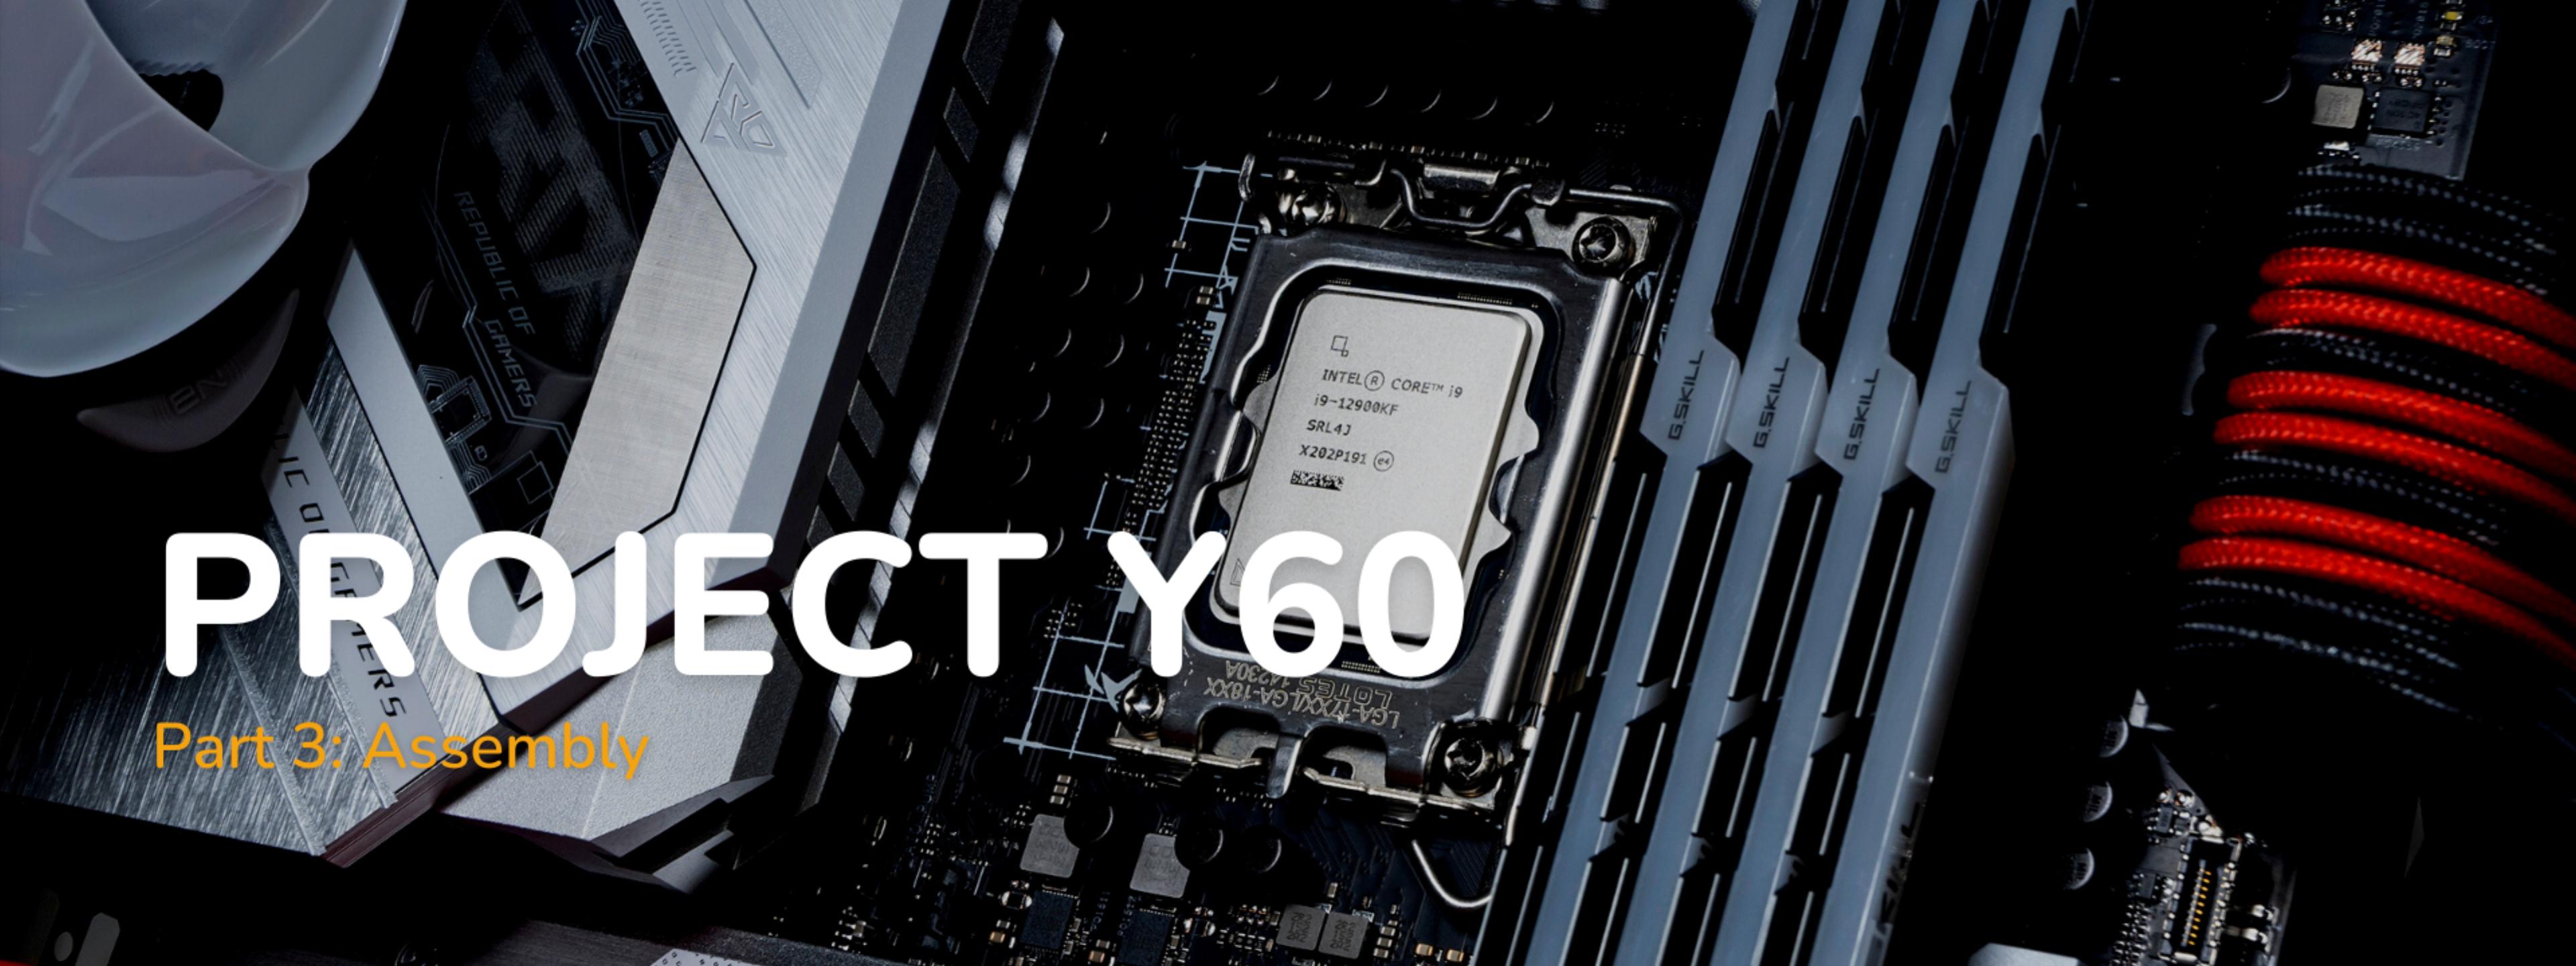
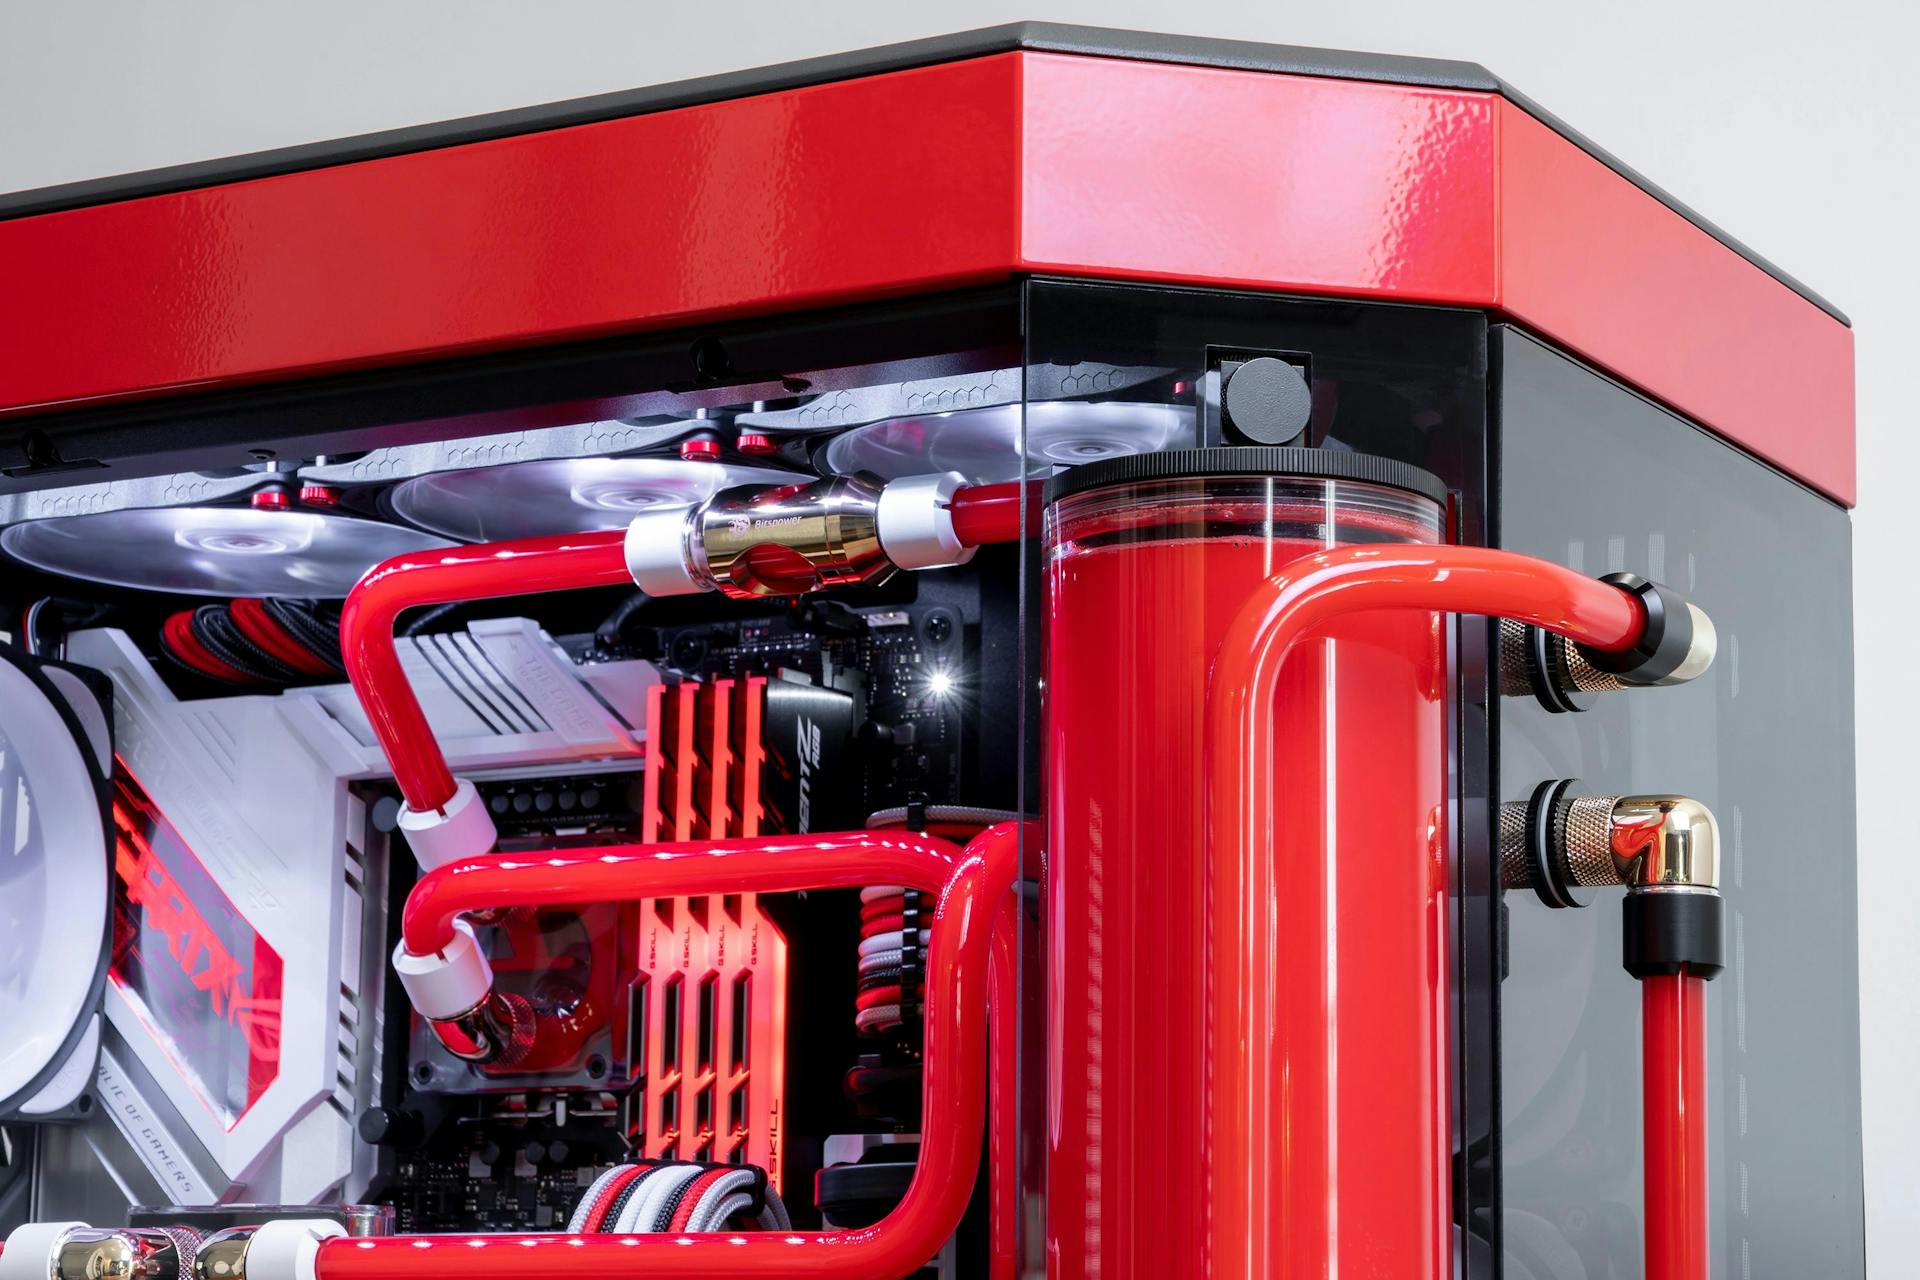
Being that HYTE had sent us an Asus Z690-A Strix motherboard, it was honestly a great opportunity to feature a tasteful red and white color scheme. Additionally, we found a clean way to integrate some gold accents into the red and white to give the build some extra pop.
It was our first time using Asus’ new Z690-A Strix motherboard, and wow what a stunner it is! Not to mention it being a DDR4 Z690, which are actually fewer and far between.
G.Skill’s 32gb 3600mhz Trident Z heatsink design was the perfect match-up with the angular heatsinks and aesthetic of the Strix board. We were happy that the angular look was repeatable throughout some of the other components and build layout - not to mention the trademark 45-degree cut at the front of the Y60 case!
This is a great case option for those of you who may currently already have an ATX or M-ATX sized motherboard.
The Brain and the Heart
This build is also packing the top-of-the-line Intel Core i9 12900KF Processor, which other than excluding an integrated GPU in the mix, is the tippy top of gaming performance - perfectly matching what this build will be when finished.
Also being thrown into the mix is WD Black’s SN850 2TB NVMe SSD. This drive packs some insane transfer speeds and is perfectly up to par with the rest of the components.
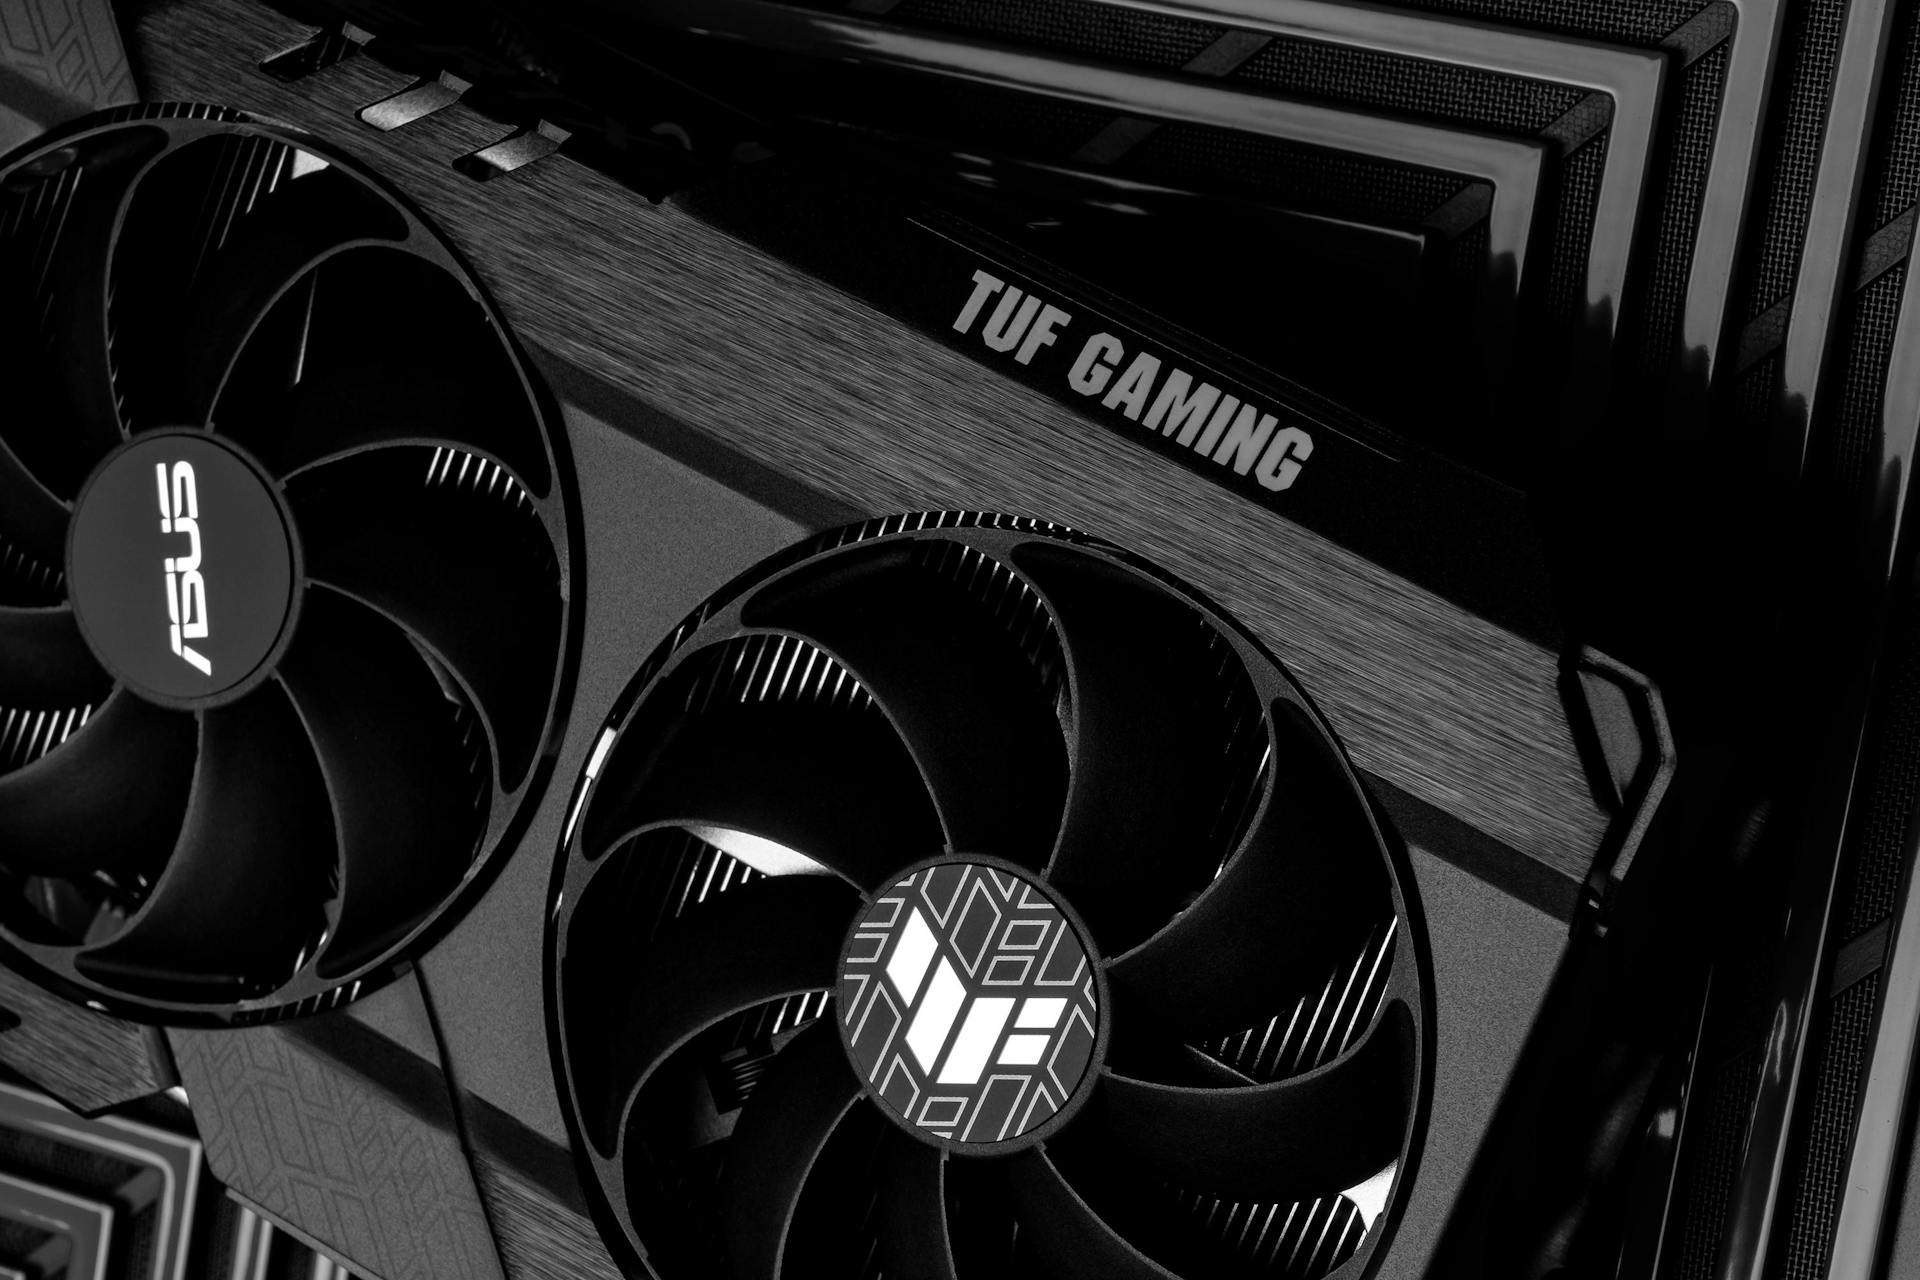
When thinking about a gaming PC, the most sought-after and needed part of a gaming build would be the GPU. Asus was able to supply their TUF series RTX 3080Ti for this build. I’ve had the opportunity to build with the Asus Strix 30 series cards, with this being the first time I’ve built with the TUF 30 series cards. I’m unsure of which card I like more.
Last but most definitely not least, you need something substantial as well to power everything up, and so Corsair’s RM850X was the solution HYTE had chosen for the build.
We always try to include individually sleeved cables for every major project we’re brought on to do, and we’ve been fortunate to work with CableMod for cable solutions. However reality is often disappointing, and the custom configuration that we had in mind couldn’t be possible due to a COVID outbreak within the shipping supply line.
Luckily CableMod was then able to provide their pre-existing red and carbon combination sleeved kit for the Corsair line of power supplies. This color combination actually worked out perfectly as well, and we were very happy with the result.
EDIT: We had some luck on our side! The original CableMod configurator order came in a day before the Y60 launch, and so we were able to swap out all of the cables except the EPS cables, as once everything was mounted up, it was impossible to pull out without further disassembly.
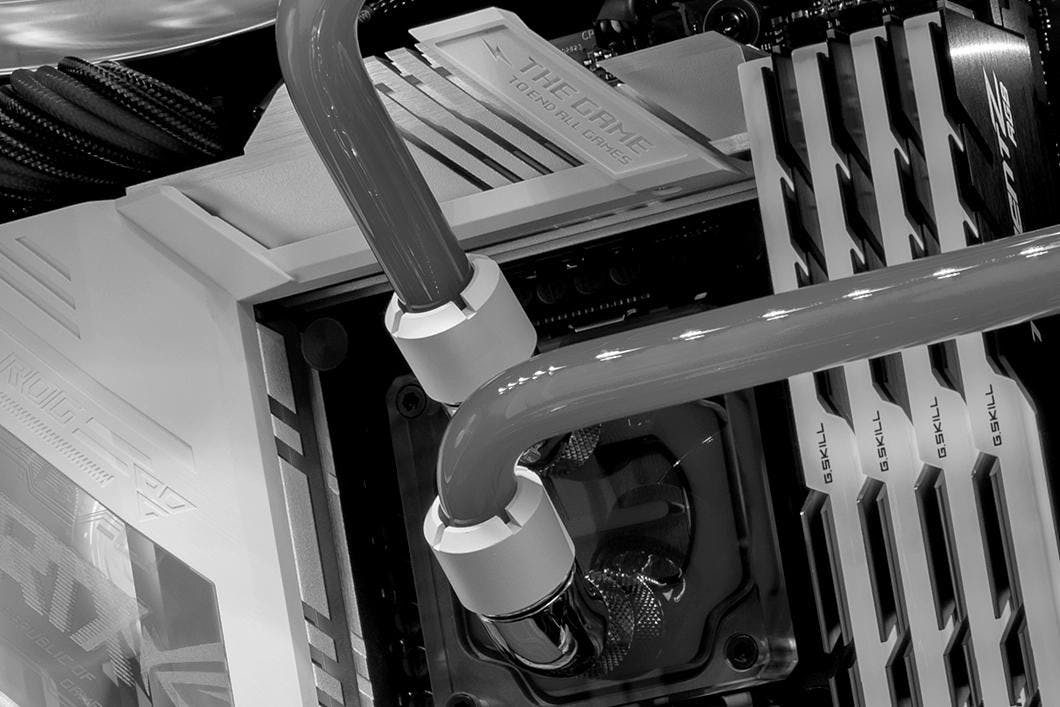
The final build assembly was very straightforward, even when dealing with the fixed position of the Koolance reservoir in the front corner.
Details Matter
The layout of the Y60 helps provide clear placement and routing solutions for your components, and it actually helped speed up the assembly process.
Being that the top 360mm radiator had the end tanks at the front corner of the case, we decided to turn the end tanks in the downward position for the 240mm radiator. This would allow proper spacing between ports for the tubing, not to mention an awesome opportunity to mirror the angled vent design of the false floor with hard tubing!
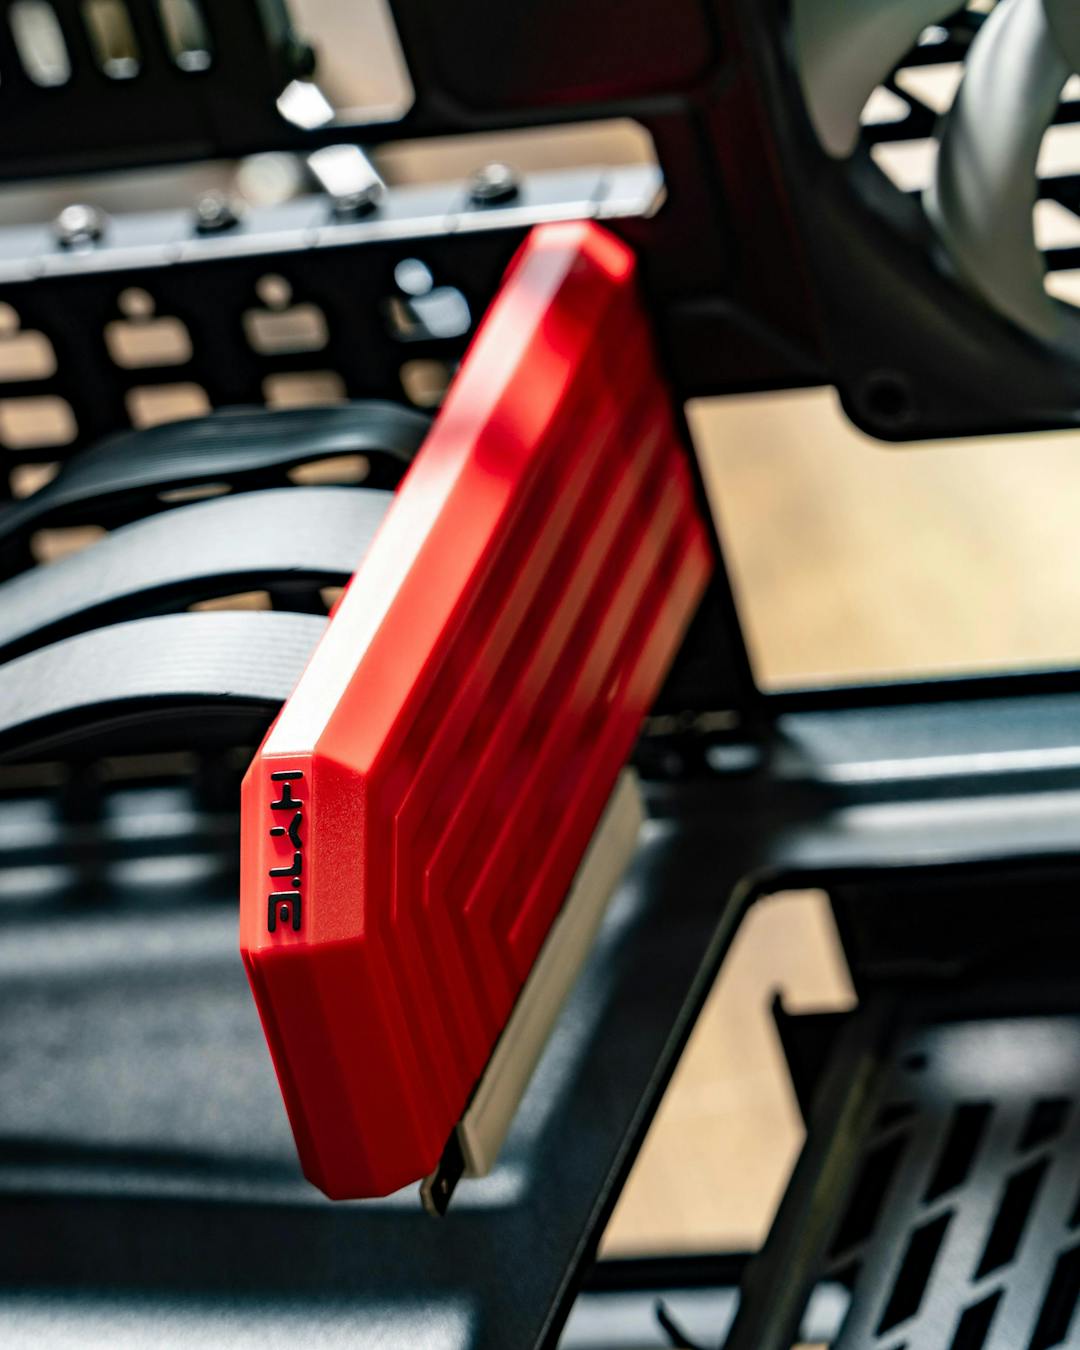
One really cool aspect of the Y60 is the included dedicated riser cable. This riser cable is essentially its own component, with matching red plastic and HYTE branding. It’s designed with a short I/O bracket, which is essential to the design of the Y60’s rear layout.
The riser cable also having a dedicated mounting location built within the false floor also can relieve any stress or sag that a heavy graphics card would create. It is evident that the product development team paid attention to a common pain point when it comes to PC building, and was able to integrate a solution in the chassis.
Lighting it Up
As with any system that’s designed to look good, RGB lighting is somewhat of a staple in this regard. However, in our opinion, this is best approached in moderation.
It’s very easy to let the RGB factor take over, and suddenly you'll have rainbow lighting blinding your eyes, and taking away from the craftsmanship of the components you wanted to show off in your build in the first place.
Being that the Optimus Foundations CPU waterblock doesn’t have any integrated lighting, this actually dictated the rest of the lighting layout for the build. I removed the ARGB lighting strip within the Bitspower TUF 3080TI waterblock, and focused on overhead lighting that would shine on everything proportionally.
I opted to use Noiseblocker’s eLoop X’s to provide lighting at the top, however, this ended up looking too dim behind the tinted glass and acrylic, and so I included a secondary ARGB strip at the top of the case, running along the length of the 360mm radiator.
Tying it Together
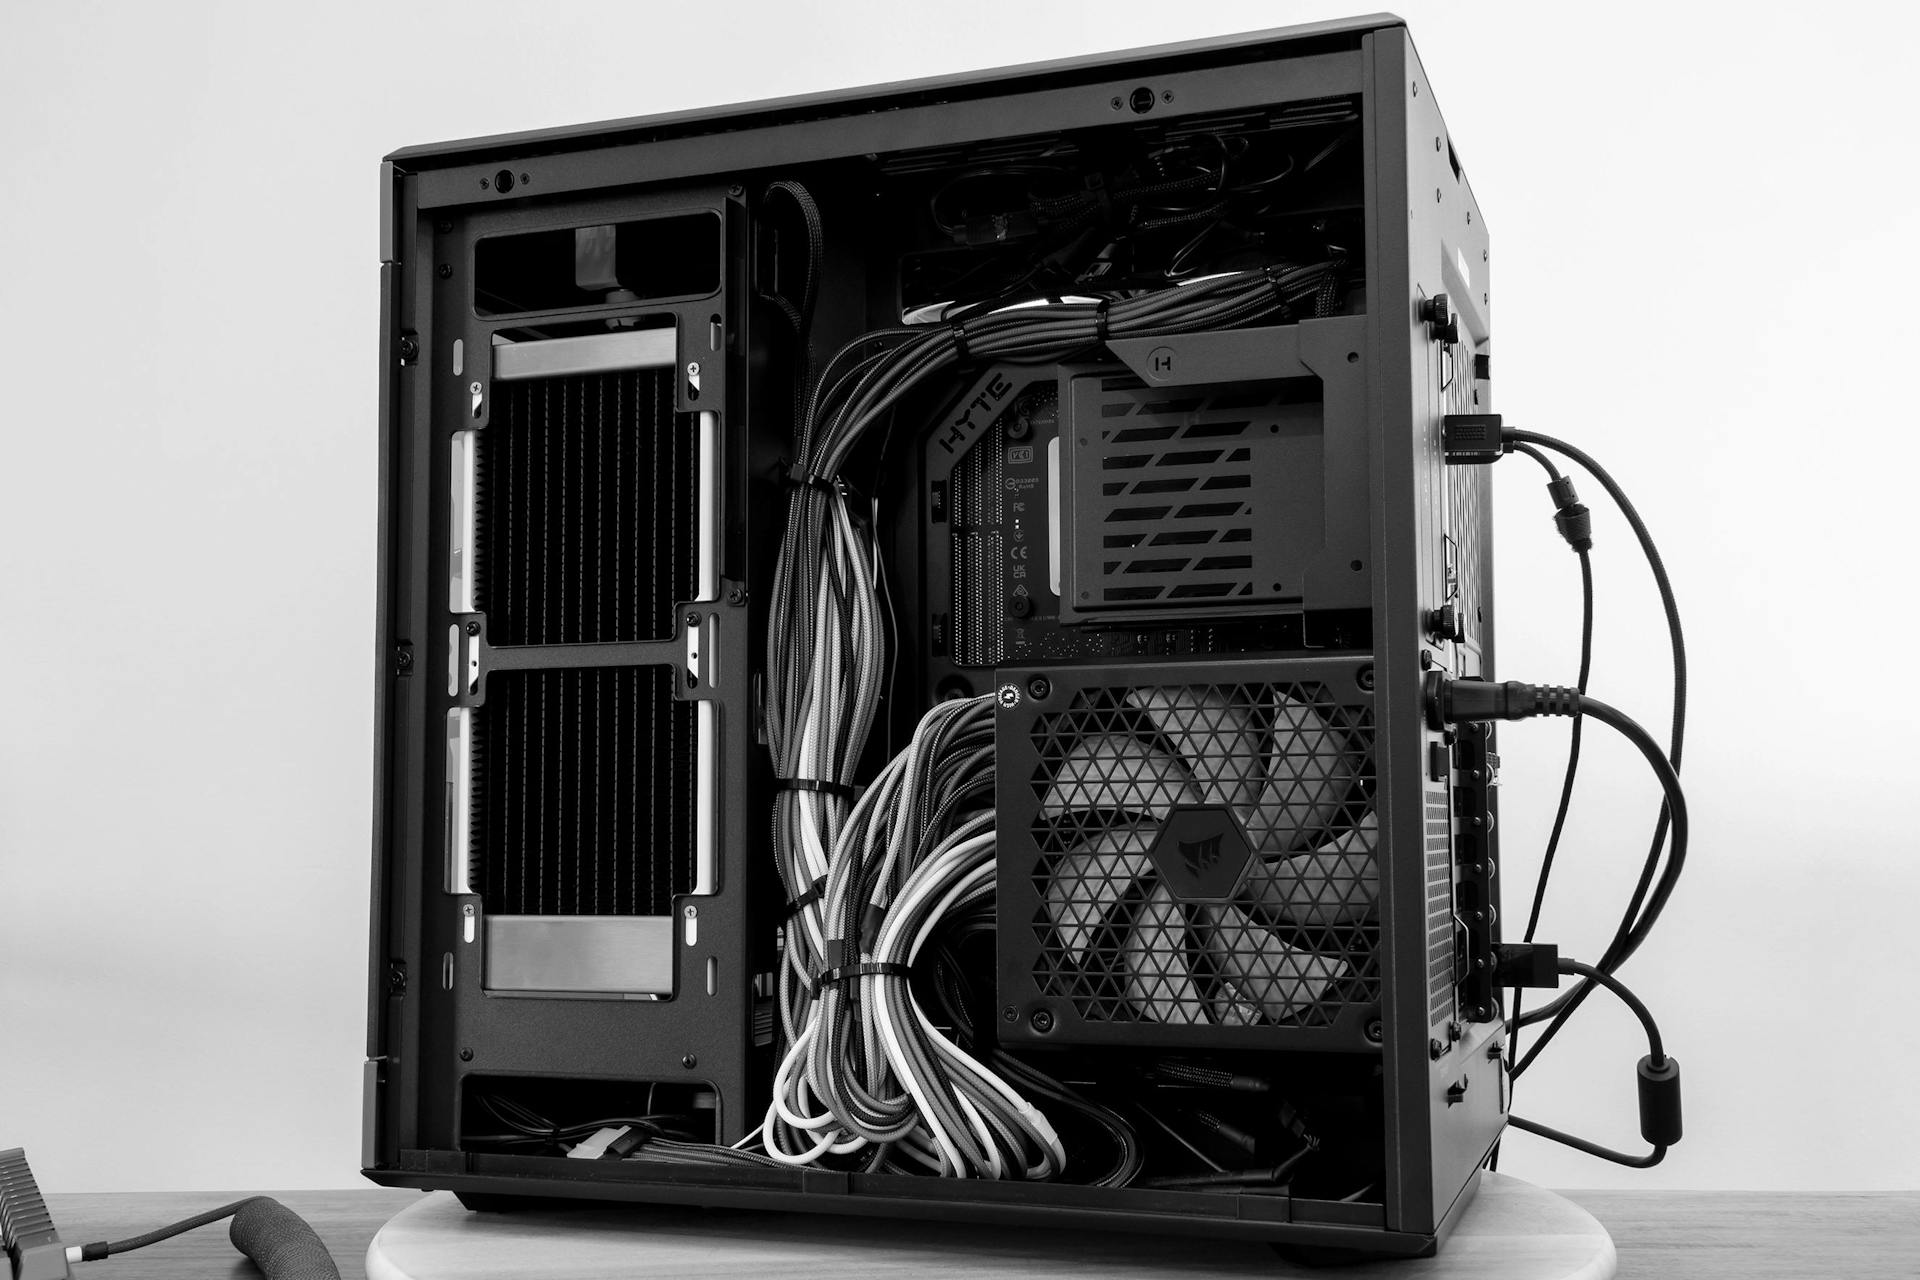
Cable management is usually the aspect of a PC build that is often meme’d, because it is collectively the least fun part of assembling a PC. However, with the Y60, it is insanely simple to route all of the I/O cables whilst keeping them completely hidden.
The D5 pump from the Koolance reservoir was equally simple to route the wiring since the wiring resides at essentially the same place as the I/O wiring. The fan and ARGB wiring were easily managed, due to the convenient cutouts for fan wiring that HYTE made sure to include with the Y60 layout.
The power supply cabling was the easiest part of the wiring process, partly because of the CableMod sleeved cables, but also because HYTE already thought all of this through, and placed zip-tie locations at all of the right places for them, so you have plenty of options for routing cabling efficiently. This is just another example of the mindfulness that went into the design of this case.
Final Touches
With the system finally complete, it’s time to sit back and enjoy the fruits of labor. Check out the last part of our series, where we discuss our final thoughts on the build and the Y60!
Featured Posts

X50 Astral Orange Is Almost Here: Pick an Orange
The X50 Astral Orange is almost here, and we are turning up the heat in the best way we know how. It is time to celebrate the orange side of gaming.

Black Friday Gaming Gear & PC Deals 2025
HYTE Black Friday sales are here, and we’re excited to share the amazing deals we’ll be offering this year! Our Black Friday sales event is your chance to save big on some of our most popular products. From November 20th through December 2nd, enjoy incredible discounts on PC cases and gaming accessories that bring both performance and style to your setup. If you’re looking to upgrade, now’s the perfect time to do it with HYTE.
Official HYTE x Honkai: Star Rail Firefly Collection!
The stars have aligned, and the Official HYTE x Honkai: Star Rail Firefly Collection is ready for launch.
HYTE's 4th Anniversary Sale!
We’ve come a long way, and it’s all thanks to you! To celebrate HYTE’s anniversary, we’re giving back with a limited-time Anniversary Sale from Oct. 5 to Oct. 7.